Every few months someone asks me which Zigbee stick to buy, and every few months I give a slightly different answer. This time I sat down and read the manufacturers’ own pages instead of answering from memory, because one sentence on Home Assistant’s ZBT-2 page changed how I think about the whole question.
That sentence: the ZBT-2 runs Zigbee or Thread, not both at once. Multiprotocol is technically possible on the chip, but according to Home Assistant’s own ZBT-2 page Nabu Casa found it performed poorly and does not plan to implement it. Their recommendation is a separate device per protocol.
Why that sentence matters
For a couple of years the pitch for one radio doing everything was tempting: one dongle, one USB port, Zigbee and Thread together. I never ran it in anger, and honestly that is the point. If the people who build the platform tried it and walked away, I do not need to be the test subject on a network my family relies on for the lights.
The practical rule I take from it: one radio, one job. If you want Zigbee, buy a Zigbee coordinator. If Thread is on your horizon, plan a second, separate radio rather than hoping a firmware flag will save you. The same roundup notes that the Sonoff Dongle Plus MG24 offers MultiPAN as experimental and not supported by Home Assistant, which fits the picture.
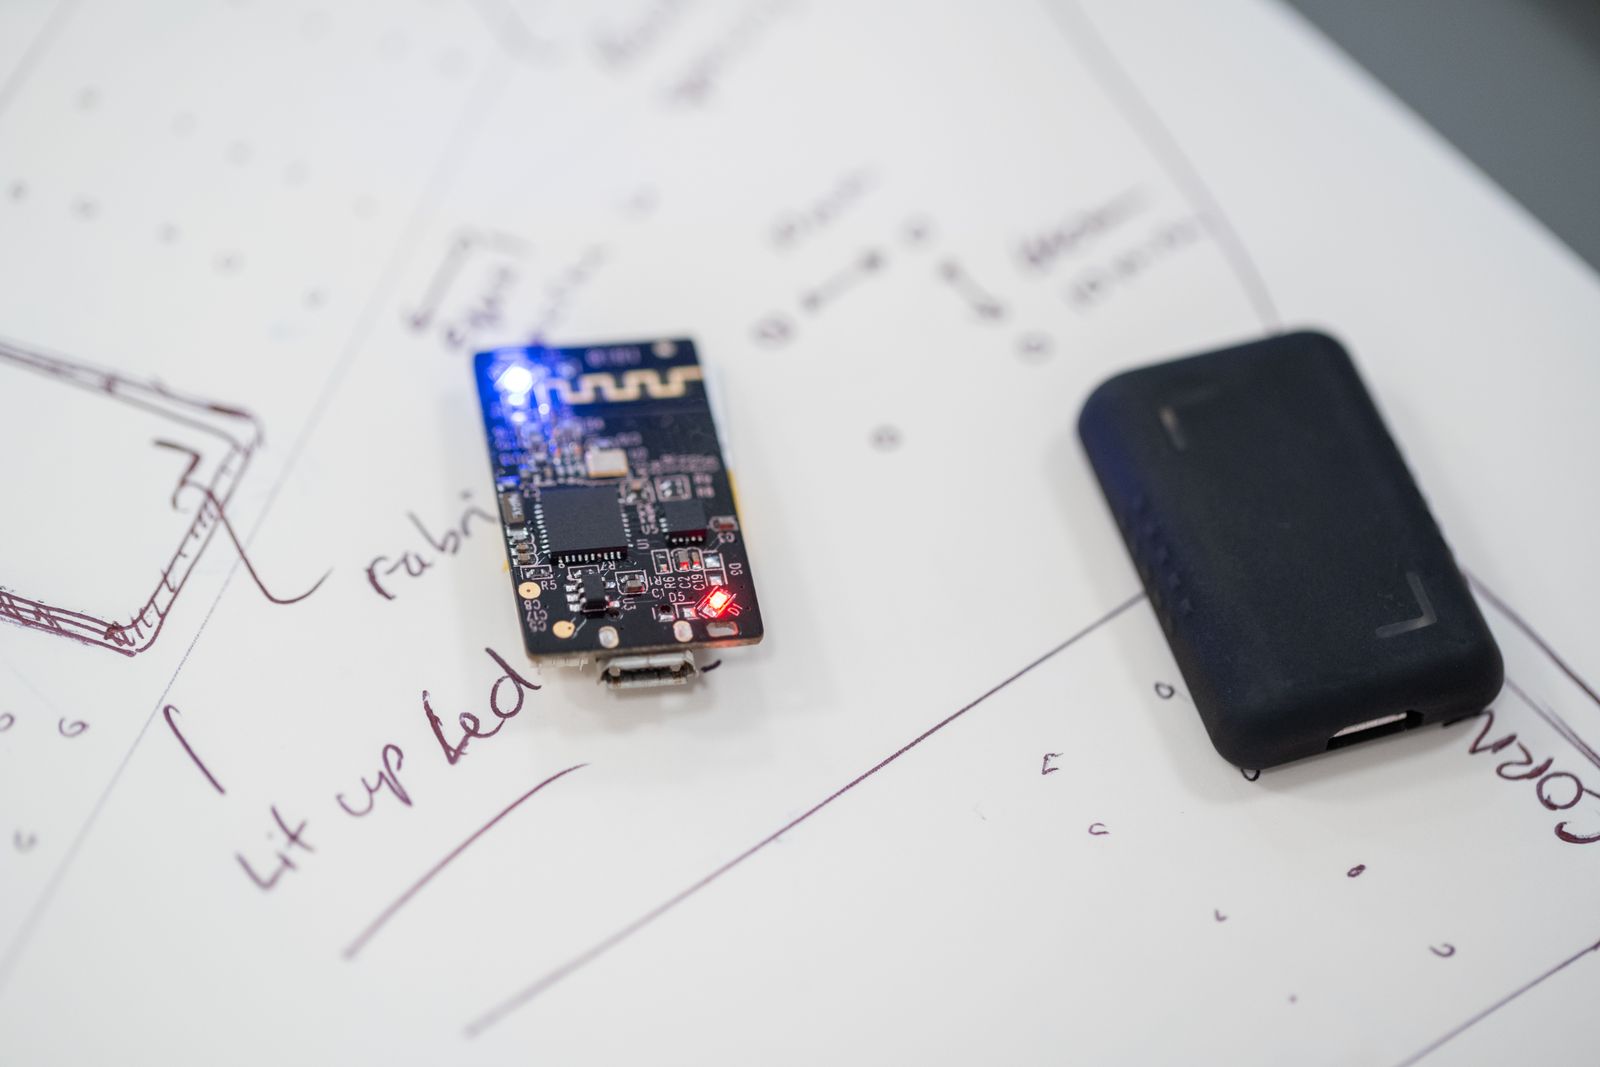
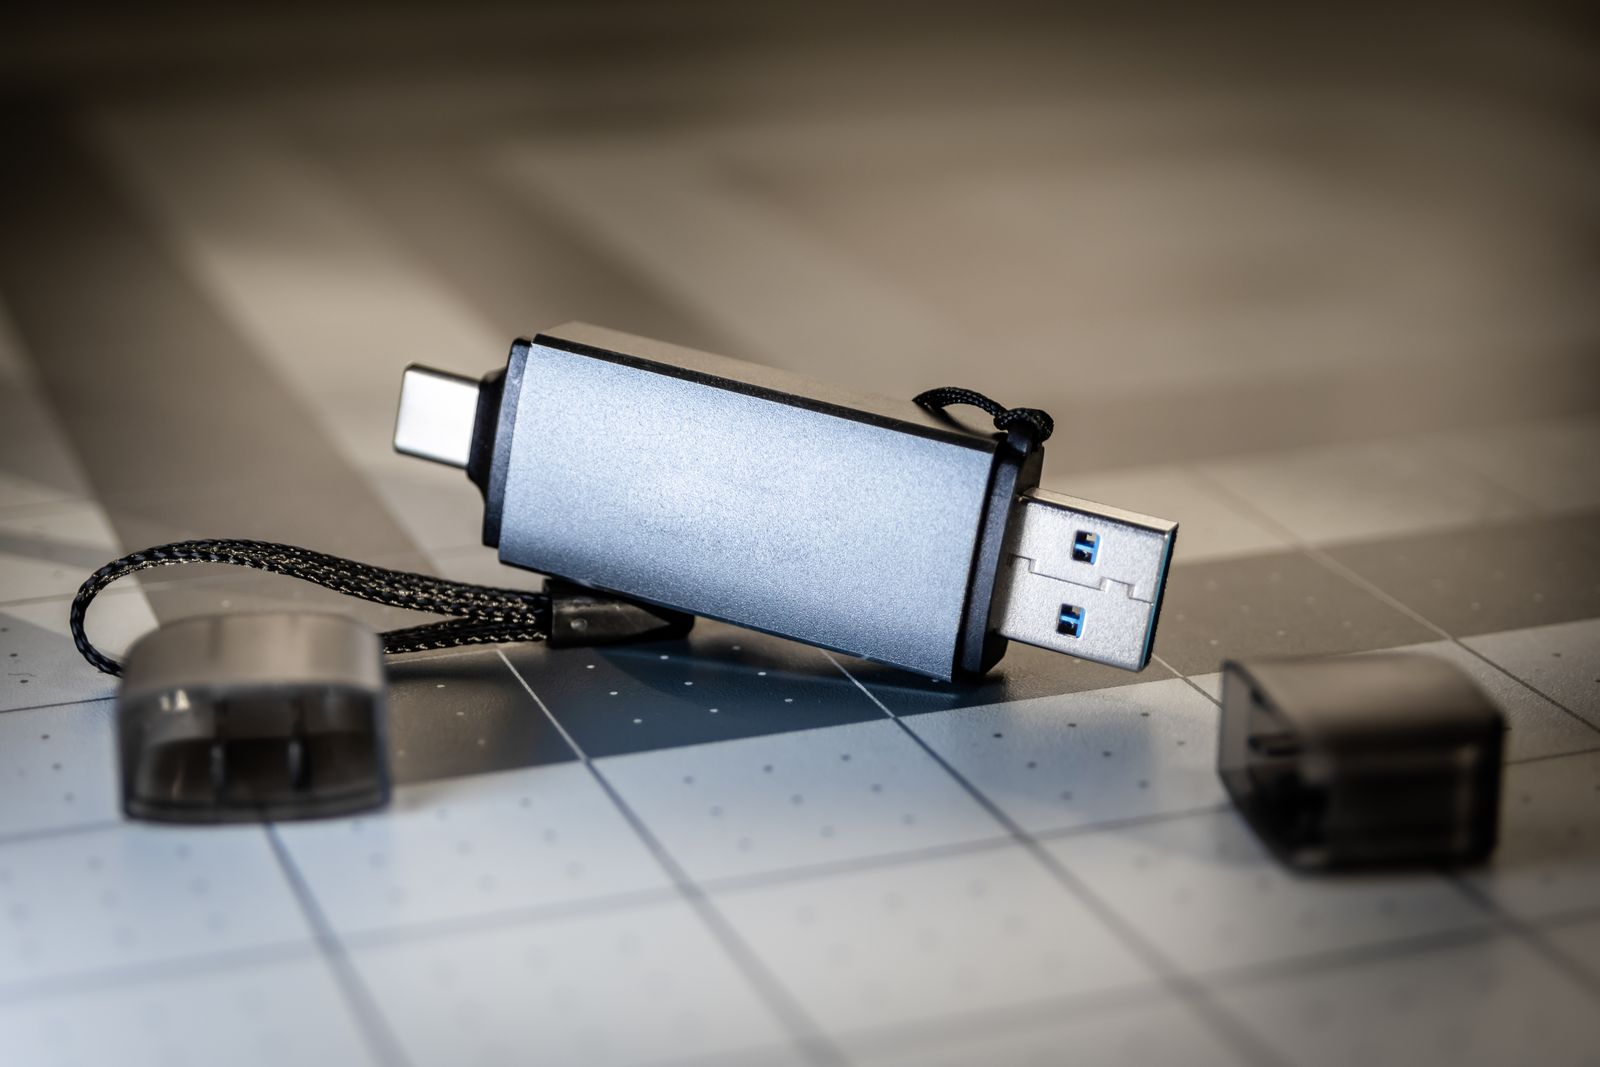
The USB stick. The ZBT-2 is listed at $49 / €45, uses a Silicon Labs MG24 radio with an ESP32-S3 handling the USB-serial link at 460800 baud (four times the ZBT-1’s 115200), and ships with a 1.5 m cable. The Sonoff ZBDongle-E, on the older MG21 chip, is described as the budget pick that is still reliable with both ZHA and Zigbee2MQTT. For a single small house, a stick is perfectly sensible.
The network coordinator. The SMLight SLZB-06MG24 and Sonoff Dongle Max connect over USB, LAN, PoE or Wi-Fi, and the roundup calls the SLZB-06MG24 its top PoE pick, good for up to 350 Zigbee end devices. The appeal is placement: the coordinator goes where the radio is happiest, with a network cable as the only tether, rather than wherever your server happens to sit.
The dual-radio box. The SMLight SLZB-MR5U carries two MG24 radios so Zigbee and Thread run side by side, with capacity listed at 750 devices (350 Zigbee, 400 Thread). This is the sensible way to get both protocols in one enclosure: two radios, not one pretending to be two.
What I would do in my own rack
My Home Assistant machine is a used HP EliteDesk mini PC tucked away in a cabinet, which is exactly the situation where a radio does not want to live. Metal, a pile of cables and nearby USB 3 devices are not a friendly neighbourhood for 2.4 GHz. Even Home Assistant’s page says range depends on building materials and placement, and the ZBT-2 sits at 10 dBm transmit power in Europe, so a good location matters more than a bigger number on a spec sheet.
So for a fresh build I would lean toward a PoE coordinator if the cabling allows it, and a stick on a proper extension cable if it does not. I would not pay extra for a Thread radio until I owned Thread devices I actually wanted. Buying hardware for a protocol you might adopt is how drawers fill up.
Where I would not overthink it
If your network already works, leave it alone. Migration wizards exist and the ZBT-2 offers one, but a working mesh is worth more than a faster serial link. The upgrade I would consider is a failing or flaky older stick, or a house that has outgrown a single well-placed router device.
One more caution: Nabu Casa notes the ZBT-2 is not a standalone Thread border router, and its experimental repeater firmware means reflashing to get a coordinator back. Read the fine print before you flash anything you only own one of.
Photo: Pexels
The short version
Pick the protocol first, then the shape. Zigbee only: a PoE coordinator or a stick on an extension cable. Zigbee plus Thread: two radios, whether in one box or two. And treat anything marked experimental as a hobby project, not the foundation of your home. I will keep documenting what I actually buy and run here, affiliate-free until I have something I would genuinely recommend.
For a long time I treated presence detection as a shopping problem. Find the right sensor, put it in the room, done. Every few months a new radar module or a new Aqara model would appear and I would wonder whether this was the one that finally made the lights stop turning off on me while I sit perfectly still reading.
It took me an embarrassingly long time to accept that there is no such sensor, because “is someone here” is not one question. I was reminded of this recently by a guide on Big Iron that frames presence as a stack rather than a winner. I do not agree with every detail, but the framing matches what I have learned the slow way, so here is my version of it.
Photo: Pexels
Three questions wearing one name
When I say “presence”, I actually mean one of three things. First: is someone in this room right now, even if they have not moved for twenty minutes? Second: which person is it, when more than one of us lives here? Third: is anybody home at all, or has the house been empty since the morning?
A PIR motion sensor answers none of these well. It answers “did something move a moment ago”, which is why every PIR-based automation eventually grows a timer, then a longer timer, then a second condition to cancel the timer. I have written that automation more times than I would like to admit.
Room presence: radar earns its place
For the first question, millimetre-wave radar is the first technology that actually fits. It picks up tiny movements like breathing, so a person on the sofa does not vanish after the PIR timeout. That is the whole reason to pay for it.
The options split along protocol lines, and I care about those more than spec sheets. According to the comparison on Smart Home Field Guide, the Aqara FP2 is Wi-Fi, mains-powered and reaches Home Assistant through the HomeKit Controller integration, while the newer FP300 is battery-powered, speaks Thread and Zigbee, and can join through Matter over Thread. The same page lists the Everything Presence One as a Wi-Fi ESPHome device that needs a little assembly. Treat the prices quoted there as a snapshot, they move constantly.
My own preference follows from the local-first rule I run the house by. A battery sensor on Thread or Zigbee can go anywhere, including places with no outlet, and keeps working when the internet is gone. A Wi-Fi device is fine too, as long as it is controlled locally and does not need a vendor account to function. If I were buying one tomorrow, the FP300-style battery radar would be the first thing I look at, mostly because wiring a USB cable to a ceiling corner is a chore I have already done once and did not enjoy.
If you like to tinker, the cheap route is a bare LD2410 or LD2450 radar module on an ESP32 with ESPHome. The Big Iron guide puts these at roughly ten and twenty dollars. You trade money for time: placement, sensitivity and the occasional false trigger from a ceiling fan or a pet become your problem to tune.
The part people skip: do not trigger on the raw sensor
This is the idea from that guide I found most useful. Radar is noisy in ways PIR is not. It sees the curtain move, it sees the cat, it occasionally sees nothing at all for a few seconds. If a light automation fires directly off the raw sensor, you will notice every one of those moments.
Home Assistant has a built-in answer, the Bayesian binary sensor. You feed it several observations, each with a probability of being seen when the room is occupied and when it is empty, and it computes a combined belief. A radar reading alone can be outvoted by, say, the phone being at home and the desk lamp being switched on. I am not going to claim it is magic, because you still have to pick sensible numbers, but it moves the flicker out of your automations and into one place you can tune.
Who is in the room, and who is home
For the second question, radar cannot help. It knows someone is there, not who. The usual answer is Bluetooth: small ESP32 receivers around the house with ESPresense or Bermuda. The guide is honest that iPhone address randomisation makes this fiddly, and I would add that it only becomes worth the effort when automations genuinely differ per person. In a two-person home, most of mine do not.
The third question, home or away, is the one I solved first and with the least hardware: the phone’s companion app, possibly together with the router seeing the device on Wi-Fi. It is coarse, and Wi-Fi power saving can make a phone look away when it is lying on the table. But for “turn the heating down, nobody is here” coarse is fine.
What I would actually buy
Not a bundle. I would start with the room where the PIR timer annoys me most, usually the living room or the home office, put one radar sensor there, and build the Bayesian wrapper before touching a second room. Live with it for a week. Only then decide whether the next room needs radar, or whether a plain door contact and a PIR is enough. Bathrooms and hallways rarely need anything fancier.
The stack the guide recommends for most homes, radar in the key rooms plus phone-based home or away, matches where I have landed. Cameras for occupancy I would skip entirely, which also fits my no-cloud, no-eyes-in-the-living-room habit.
The honest summary: stop looking for the perfect sensor. Pick the right tool for each of the three questions, combine the signals, and let the automations trust the combined answer instead of any single device. My lights stay on while I read now. It only took a few years.
I have four PIR motion sensors bolted to walls in my flat, a couple of mmWave presence sensors under the TV console, and a Frigate instance chewing through camera frames in the basement rack next to my HP EliteDesk. So when I saw a thread on the Home Assistant community forum claiming my router had been capable of sensing motion in my living room this whole time — no extra hardware, no camera, just Wi-Fi doing what Wi-Fi already does — I assumed it was overselling itself. It wasn’t, entirely. It also isn’t magic. Here’s what I found once I stopped skimming replies and actually read the project.
What ESPectre Actually Does
ESPectre, built by Francesco Pace and released under GPLv3, uses Wi-Fi Channel State Information (CSI) — the fine-grained data an ESP32 radio already sees about how a Wi-Fi signal is distorted between your router and the device — to notice when a body moves through that signal path. No microphone, no lens, no cloud service parsing a video stream. The processing happens entirely on the ESP32 itself.
The hardware bar is refreshingly low: a CSI-capable ESP32 (the S3, C3, C6, or the original ESP32 all qualify — a roughly €10 part) and a spot 3 to 8 meters from your existing router, no special access point required. The clever bit is something the author calls NBVI — Normalized Band Variance Index — which auto-selects the useful subcarriers from the CSI data so you don’t have to hand-tune anything for your specific room. There’s also an experimental ML-based detector in the works that skips the calibration step entirely. It flashes over ESPHome, so if you’re already comfortable editing YAML for other sensors in your setup, there’s genuinely nothing new to learn to get a device reporting a binary motion state into Home Assistant.
An ESP32-class board is the only extra hardware ESPectre needs — no camera, no dedicated sensor module. Photo via Pexels.
The Home Assistant Community’s Verdict So Far
The community forum thread has been quietly running since December and picked up a fresh wave of testers this month, which is where I found it. The tone is unusually consistent for a forum thread: people flash it, it works better than they expected, and they say so. One tester running an ESP32-S3-N16R8 through ESPHome summed it up bluntly after getting it running: “It works perfectly.” Even the founder of a competing commercial Wi-Fi-sensing product showed up to wish the project well, which tells you something about how small and collegial this corner of the ecosystem still is.
That’s the kind of signal I actually trust more than a polished launch post — a thread full of people with mismatched hardware, in real rooms, reporting back over weeks.
The Rough Edges Nobody’s Glossing Over
To the thread’s credit, the rough edges are right there in the open too, and they’re the kind of thing that would have bitten me if I’d rushed into it. ESP8266-based devices — including plenty of older Sonoff hardware people already have deployed — can’t run this at all; CSI extraction needs the ESP32 radio specifically. One user on an ESP32-C3 saw memory warnings (“Send error: -1 errno: 12”) that didn’t stop detection but weren’t reassuring either. Another reported that adding a Bluetooth proxy to the same ESP32 broke a previously working ESPectre setup entirely — a combination the author himself hadn’t tested. And after a power loss, the detection threshold can come back reporting “unknown” until you manually re-tune it.
The bigger conceptual limit, though, is that this measures motion, not presence. Sit still long enough and it reports the room as empty, same as a PIR would — it can’t yet tell “empty room” from “person sitting quietly,” and it can’t tell a person from a cat crossing the same signal path. Pace has said presence detection is on his roadmap, alongside a Python-side “micro-espectre” project exploring micro-movement analysis for things like breathing or typing detection. That’s a real research direction, not marketing filler, but it isn’t shipped yet.
Where This Fits in a Local-First Stack
What actually pulled me in isn’t that it’s clever — plenty of things are clever — it’s that it’s local by default and open by license. No account, no app phoning home, no subscription gate on the “good” detection mode, GPLv3 all the way down with a commercial license only for anyone embedding it in a product. That’s the same reason I run Home Assistant OS bare-metal on a used EliteDesk instead of leaning on a hub-in-the-cloud: I want the failure mode of my internet going down to be “automations still run,” not “my motion sensor is now a brick.” ESPectre’s whole pitch is built around that same failure mode, which is probably why it resonates so quickly with this particular community.
Where I wouldn’t reach for it yet: anywhere I actually need presence, not motion — my home office, where I sit still reading for twenty minutes and don’t want the lights cutting out. My mmWave sensors already solve that, and they solve it today, not on a roadmap. Where I would reach for it: hallways, stairwells, entryways — the spots where a cheap PIR already does the job, but where “just flash an ESP32 I probably already own” beats ordering one more single-purpose sensor and waiting for a delivery.
Would I Actually Install This?
Yes, in one spot, as a genuine experiment rather than a replacement for anything load-bearing in my automations. I’ve got a spare ESP32-C6 in the parts bin and a stairwell that’s underserved by motion coverage right now, which feels like exactly the low-stakes test the forum crowd is describing. I’m not ripping out the mmWave sensors or trusting Frigate’s job to a signal-processing trick just yet — the presence gap is real, and my automations depend on presence, not motion, in the rooms that matter most. But for a project with no company behind it, no funding round, and a GitHub repo and a forum thread as its entire go-to-market, “works perfectly” from strangers with mismatched hardware is a better signal than most Kickstarter demo videos I’ve watched. I’ll report back once the stairwell has had a few weeks to prove it wrong.
Every Shelly relay in my walls has a radio it is not using. The Gen4 chip speaks Wi-Fi, Bluetooth and IEEE 802.15.4, the low-power radio underneath both Zigbee and Thread. Out of the box, mine run on Wi-Fi. Shelly has let you flip Gen4 devices to Zigbee for a while, but Thread, the thing my Home Assistant box has been ready for since I set up the ZBT-2 as a border router, was never an option.
On September 3, just before IFA, Shelly announced it is changing that. The firmware is called ThreadLink, and it is more ambitious than I expected. I have read the press release several times now. What I keep coming back to is not a Shelly feature. It is one setting on my own border router.
What ThreadLink actually is
Most Thread devices use Thread for exactly one thing: Matter. If a vendor wants anything beyond what Matter covers (their app, their cloud, energy history, their own scripting), that traffic usually goes over a second radio, which in practice means Wi-Fi.
ThreadLink takes a different approach. Thread is already an IPv6 network, so Shelly runs a full IP stack over it: 6LoWPAN, UDP, and TCP for larger transfers like configuration and updates. Three things then ride on the same mesh at once:
Matter, for Home Assistant, Apple Home, Google Home, Alexa and SmartThings.
The Shelly RPC API, device to device. Scenes and interlocks run peer to peer inside the mesh, and Shelly says they keep working if the internet or the whole Wi-Fi network goes down.
Shelly Cloud, reached through the border router using NAT64, which translates the mesh’s IPv6 traffic to the IPv4 internet. No Wi-Fi credentials are stored on the device at all.
The fine print matters. It is a separate, opt-in firmware, and you choose per device whether it runs the normal Wi-Fi firmware or ThreadLink. It is not both at once, the same either/or deal as the Gen4 Zigbee mode. It will be free, delivered through the Shelly app and web interface, and Shelly puts it roughly three months out from the September 3 announcement. So think December, give or take. Shelly has not published which Gen4 models are eligible. The press release also promises a “dedicated module” that brings ThreadLink devices into Home Assistant with the full Shelly feature set, beyond what Matter exposes, with no details yet on what that module is.
Somebody got there first, from a van
What makes this announcement interesting is what came before it. Back in May, a developer publishing as Automatous released open-source Matter-over-Thread firmware for the Shelly 1 Gen4, later also the 1 Mini Gen4. The README says it was written from inside an old camper van. It reconfigures the ESP32-C6’s 802.15.4 radio for Thread and turns the relay into a plain Matter device: no Shelly app, no cloud, no Wi-Fi. Matter Alpha covered it at the time, and the project’s own README links a Shelly subreddit thread whose moderator credited it with a noticeable spike in Thread feature requests to Shelly.
I never flashed it, and the project is very upfront about why most people should think twice. Flashing voids the warranty and removes the factory keys that enable Shelly Cloud and official OTA updates. The quick web-UI install can’t back up the stock firmware, so treat it as one-way. It also runs on Espressif’s test credentials, so it isn’t a certified Matter product. For a relay switching a ceiling light, some people will happily take that deal. For a relay buried in a wall box behind plaster, I didn’t want to.
I can’t prove the community project caused ThreadLink, and I won’t pretend to. But the order of events is worth noticing. The README still says Shelly “currently has no plans for Thread”, and that line has aged fast. I would like to think the two versions can coexist: a certified, supported path from the vendor, and a minimal, Matter-only one from the community for people who want nothing else on the device.
The whole point of a relay is that you install it once and forget it exists. Changing what radio it speaks should not require opening this back up. Photo: Pexels.
The cloud switch lives on my border router
This is the part I didn’t expect. With Wi-Fi Shellys, keeping the cloud out takes deliberate effort. You disable the cloud connection per device, and if you’re thorough you block the devices’ outbound traffic at the firewall, and you hope a firmware update doesn’t quietly turn anything back on. I’ve been doing some version of that for years.
With ThreadLink, the device reaches Shelly Cloud through NAT64 on the border router. My border router is Home Assistant’s own OpenThread Border Router add-on running on the ZBT-2. That add-on has a NAT64 option, and it is off by default. Mine is off, because nothing on my mesh has ever needed to reach an IPv4 address on the internet.
If I understand the design correctly, and I will test this rather than assume it, that means a ThreadLink relay on my mesh simply has no path to Shelly Cloud. I wouldn’t need a per-device toggle or a firewall rule, because the network it lives on can’t reach the IPv4 internet. Matter to Home Assistant would still work, and so would device-to-device scenes inside the mesh, because none of that leaves the house. For a local-first setup, that is a better default than anything I’ve had with Wi-Fi relays: local is what you get unless you choose otherwise, instead of something you have to switch on per device.
The flip side is equally clear: people on Apple, Google or Amazon border routers don’t control NAT64 the same way, so for them cloud access will likely just work. That is fine. It is their house.
What I’d lose, and what I don’t know yet
My Wi-Fi Shellys do more than switch. They can speak MQTT, they have a local web UI I can open from my laptop, and a couple of them act as Bluetooth gateways for BLU sensors. The press release confirms the RPC API over Thread and firmware transfers over TCP. It says nothing about MQTT, the web UI, on-device scripts, or whether a ThreadLink relay can still relay BLU sensor advertisements. Until the eligible models and a changelog show up, I’m treating every one of those as unknown.
There’s also a concentration problem I’d be walking into. Today, if my Home Assistant box dies, my Wi-Fi relays keep working locally and I can still reach them. On ThreadLink, they’d depend on the Thread mesh, and my mesh has exactly one border router. Scenes inside the mesh would survive, and Shelly is right that this is more resilient than cloud-dependent logic. But reaching those relays from anything outside the mesh would go through a single USB stick on a single mini PC. A second border router has been on my “someday” list. ThreadLink would move it up.
And one question for the Home Assistant side: will the “dedicated module” be an extension of the existing Shelly integration, or something separate? The current Shelly integration is local push and excellent, and its docs say nothing about Thread. If ThreadLink devices show up as Matter entities with a Shelly-flavoured layer on top, that’s fine. If it means a second integration for the same physical device, I’ll want to see how the two coexist before I convert anything important.
My plan for December
Buy nothing now. Nobody knows which models are eligible, so buying a Gen4 relay today because of ThreadLink is buying a promise. If you need a relay anyway, Gen4 is still a reasonable pick, just not for this reason.
Pick one low-stakes relay. When the firmware ships, it goes on the hallway light, not anything wired to heating or a door.
Test the NAT64 theory. With NAT64 off, confirm the relay commissions over Matter, works in Home Assistant, and makes no attempt to reach Shelly Cloud that gets anywhere. Then flip NAT64 on briefly and see what changes.
Pull the plug on purpose. Stop the Home Assistant box and check which scenes still run inside the mesh, the same way I tested my backups by wiping the box.
I have been cautious about Shelly this year. The 2.0.0 security cleanup was overdue, and I rolled it out one relay at a time. ThreadLink is the first Shelly announcement in a while that I’m actually excited about. The main reason isn’t Shelly’s cloud or its app. It’s that, on my network, the design seems to make the local-only setup the default. I’ll report back when there’s firmware to flash instead of a press release to read.
There is a Home Assistant Connect ZBT-2 plugged into the back of my EliteDesk. By most measures it is the best Zigbee coordinator you can buy in 2026. It is not coordinating a single Zigbee device in this house.
It is running Thread. That is a deliberate choice, and it is the choice that quietly decides how much you should spend on a Zigbee stick — because of one sentence buried in the ZBT-2’s FAQ that most buying guides mention and then walk straight past.
The sentence that decides the purchase
From Nabu Casa’s own product page: “Connect ZBT-2 cannot do both Zigbee and Thread simultaneously.” They go further. They tested multiprotocol (MultiPAN) thoroughly on the ZBT-1, found it inconsistent and a frequent cause of device instability, and say plainly they do not plan to implement it. One radio, one protocol, dedicate the hardware.
I want to be clear that I think this is the right call and not a cop-out. Multiprotocol on a single 802.15.4 chip means time-slicing two mesh networks that both assume they own the radio. When it goes wrong it goes wrong as “my motion sensor is sometimes slow,” which is the single worst failure mode in home automation because you cannot prove it is happening. I would rather buy a second stick than debug that.
But it changes the maths. If you want Zigbee and Thread — and by late 2026, most of us who bought anything Matter-shaped in the last two years do — you are not buying one coordinator. You are buying two radios, and the second one has to live somewhere.
What the ZBT-2 actually improved
Worth being precise here, because this device gets described as a generational leap and it is more specific than that.
The ZBT-1 — you may remember it as SkyConnect — launched in 2022 and is now discontinued. The ZBT-2 replaces it with a Silicon Labs MG24 in place of the MG21, and swaps the CP2102N USB bridge for an ESP32-S3. The headline number is the serial link: 115200 baud on the ZBT-1, 460800 on the ZBT-2. Four times faster, and that is a real improvement in how quickly a busy mesh drains its queue, not a spec-sheet flourish.
The part I care about more is physical. The ZBT-1 had a small internal antenna. The ZBT-2 is a 164 mm antenna on a weighted base with 4.16 dBi peak gain, transmitting at 10 dBm in Europe. The device is genuinely large, and Nabu Casa’s answer to “why is it so big” is basically “because 2.4 GHz is physics.” They are right, and it is refreshing to see a vendor say so instead of pretending the antenna is a design feature.
MSRP is $49 / €45. In Switzerland it turns up through the usual EU channels and at least one local shop, and by the time it lands here it is closer to the top of that range than the bottom. It is still not expensive for a component that every battery sensor in your house depends on.
The Zigbee2MQTT wrinkle nobody warns you about
Yes, the ZBT-2 works with Zigbee2MQTT. No, it does not necessarily work with Zigbee2MQTT out of the box.
Units ship with an older EmberZNet build, and Z2M’s ember driver expects something newer. Plug it in, point Z2M at it, and you get a coordinator that refuses to talk — which reads like dead hardware if you do not know to check the firmware version. The fix is not hard: Home Assistant’s onboarding wizard will flash the right firmware if you let it, and you then tell Z2M to use the custom adapter path with the baud rate set to 460800. Miss that last number and you are back to silence.
This is the sort of thing that should be in the box’s quickstart guide and is instead in a support article. If you are coming from a Sonoff dongle and expecting plug-and-play parity, budget twenty minutes.
Where the radio goes matters more than which radio it is
Moving the radio onto Ethernet solves a problem no amount of antenna gain will. Photo: Pexels
Here is the unglamorous truth I keep coming back to: the difference between a good coordinator and a great one is small compared to the difference between a coordinator ten centimetres from an NVMe drive and one two metres away from it.
USB 3.0 radiates broadband noise that lands squarely in 2.4–2.5 GHz. This is not folklore — Intel documented it in a white paper back in April 2012 (document 327216-001, still hosted on usb.org), and the crucial detail is that the noise sits inside the band your Zigbee receiver is listening to, so no filter can remove it. It just raises the noise floor and eats your receive sensitivity.
A mini PC is close to a worst case: SSD, USB 3 ports, and a metal chassis all within a few centimetres of wherever you plugged the stick. The ZBT-2 ships with a 1.5 m USB-C cable and a base precisely so you do not plug it directly into the machine. Use them. If you only take one thing from this post, take that.
Which brings me to the other option. The ZBT-2 has no PoE, and Nabu Casa is upfront that this was a design decision rather than an oversight — they call PoE “a cool technology” that did not fit this product’s goals, note they shipped experimental PoE firmware for the ZWA-2 Z-Wave adapter, and say there is no PoE ZBT-2 planned. Fine. But the moment you have a PoE switch in the house, an Ethernet-attached coordinator like SMLIGHT’s SLZB-06 series stops being a niche choice. One cable carries power and data, the radio can sit in the middle of the house instead of wherever the server rack happens to be, and USB noise stops being part of the conversation entirely.
The SLZB-06 line splits by chip: the base SLZB-06 uses a TI CC2652P, which is the mature, well-trodden path for Zigbee2MQTT, while the SLZB-06M uses a Silabs EFR32MG21 and suits ZHA or a future Thread role. Both give you a web UI and over-the-air updates for the radio firmware, which is a comfort the USB sticks cannot match.
What I would actually buy
If you are starting from nothing and only need Zigbee: ZBT-2, on the supplied extension cable, into a USB 2.0 port. Done. The setup wizard is as easy as everyone says, migration from an old adapter is genuinely handled, and the open case and flashable firmware mean it is not a dead end.
If you already have a PoE switch: put the Zigbee radio on Ethernet and stop fighting your own server’s noise floor. This is what I would do differently if I were rebuilding today.
If you want Zigbee and Thread: accept that you are buying two radios. In my rack the ZBT-2 took the Thread job, because a vendor-neutral border router running inside Home Assistant OS — rather than an Apple or Google hub deciding what my Thread network is allowed to do — is worth more to me than four-times-faster Zigbee. My Zigbee mesh sits on its own coordinator, and neither network has to negotiate for airtime.
And if your Zigbee network is currently misbehaving: before you spend anything, move your existing stick two metres away from the machine on an extension cable and give it a week. It costs a few francs and it fixes this more often than a new coordinator does. I would rather tell you that than sell you an antenna.
One last note on the horizon: Nabu Casa say they are reviewing the Zigbee 4.0 spec and believe the ZBT-2 could be updated to support it, pending firmware plus Home Assistant support. That is a “believe,” not a promise. But it is a more honest answer than most hardware vendors give about a device they are still shipping.
The Home Assistant Green launched at $99 in 2023. In January this year, Nabu Casa raised the suggested price to $159 / €139. In April they raised it again, to $199 / €179. Two increases in four months, on the one piece of hardware whose entire pitch is that it is the cheap, unintimidating way in.
What I appreciate is that nobody dressed it up. The pricing post names the cause in the second paragraph — RAM — and says the component cost of building a Green “has nearly doubled” since production started. No supply-chain word salad, no vague gesturing at tariffs. And then, in the same post, Nabu Casa point readers at the installation docs and suggest you may already have something lying around that would run Home Assistant perfectly well.
That is more or less the advice I have been handing out for two years, from a house where Home Assistant OS runs bare metal on a used HP EliteDesk 800 G4 mini that cost me a fraction of a Green. So you would expect this post to be a victory lap. It is not — because the same shortage that repriced the Green has been quietly repricing my side of the argument too, and I only noticed when I went looking for a spare box to test restores on.
The used market stopped being a fixed bargain
Here is the thing about a used enterprise mini PC: the most valuable component in it is no longer the CPU. It is the memory. DDR4 kits that sold for well under a hundred dollars in late 2025 are now going for double that or worse, and the analysts covering it are talking about the squeeze lasting into 2027 rather than easing this year. Refurbishers price their stock accordingly. The listing that was CHF 90 with 16 GB eighteen months ago is not CHF 90 with 16 GB today.
The single component that moved the Green from $99 to $199. Photo: Pexels
Which kills a piece of advice I used to give freely: buy the cheap 8 GB machine, drop a 32 GB kit in later. At current prices that upgrade can cost more than the computer did. If you go used in 2026, buy the RAM already installed, in the box, from the seller. Treat the memory as the thing you are actually shopping for and the chassis as the free accessory.
What the box under my stairs actually buys me
Not speed. Home Assistant itself is not a demanding piece of software, and a Green runs a normal house without complaint. What an x86 mini PC with real RAM and an NVMe drive buys is headroom, and headroom only matters if you are going to spend it.
I have spent mine three times this year. Once when my recorder database climbed to 5.8 GB and the repack needed free space equal to the file itself — trivial on a 512 GB SSD, genuinely awkward on 32 GB of eMMC. Once when 2026.8 shipped a native llama.cpp integration and I pointed a CPU-only conversation agent at it. And once when I wiped the machine deliberately to find out whether my backups were a safety net or a hypothesis, which is much less frightening when you can pull the drive and keep the old one on a shelf.
None of those are things a beginner needs in month one. All of them are things I would have hit a wall on within a year.
What the Green buys that my EliteDesk does not
Start with the number I keep having to eat. The Green is specified at roughly 1.7 W idle. My EliteDesk sits around 10 W at the wall on a plug meter. Call it 8 W of difference, running every hour of every year: about 70 kWh, which at Swiss household rates is somewhere near CHF 20 a year. Over five years that is a meaningful slice of the price gap I was feeling so clever about. It does not erase it, but anyone quoting a purchase price without the electricity is only telling you half the story — and I have been that person.
Then the unglamorous parts. The Green is a supported platform with a warranty, a known-good power supply, and no BIOS to think about. My machine needed a firmware update I put off for months, which is exactly the drawer of neglected devices I complained about a few days ago. It is silent in a way a repurposed office PC with a small fan is not, and it does not look like a repurposed office PC, which matters in a shared flat more than enthusiasts like to admit.
And the part I refuse to hand-wave: Nabu Casa contributes the majority of its profit to the Open Home Foundation. Buying a Green funds the software I am running for free on hardware I bought from a stranger. That is not a spec-sheet line and I am not going to pretend it is worth exactly CHF 80, but it is not nothing either.
The rule I would give someone asking today
Two questions, in this order.
Do you want a hub, or do you want a server? If the honest answer is that you want lights, sensors and thermostats to work locally and you have no appetite for maintaining a small computer, buy the Green. The premium is real, the outcome is a supported box that gets you to a working smart home in an evening, and you can stop reading here.
Are you going to run something else on it within a year? Frigate with a camera or two, a local voice pipeline, an LLM conversation agent, Zigbee2MQTT plus an MQTT broker plus a Grafana you swear you will look at. If yes, a used x86 mini with 16 GB is still the better buy, because the alternative is buying a Green now and a second machine in eight months.
If you land on used, the 2026 checklist is shorter than it used to be and mostly about memory:
16 GB installed, in the listing, from the seller. Do not plan to add it later.
An SSD included and sized for the job — 256 GB is fine, 512 GB gives your recorder database somewhere to breathe.
8th-generation Intel or newer. Older silicon idles high enough to eat the savings you came for.
Original power brick included. Replacements for these little machines are annoying and overpriced.
A seller with a returns policy and a rating you would trust with a bank transfer.
The uncomfortable part
I am biased. I already own the machine, I have already spent the headroom, and it would be very convenient for me if the used route were obviously correct. It was obviously correct when I bought in. It is now a closer call than it was, and it gets closer every month that memory prices go the wrong way.
Nabu Casa ended their pricing post with advice that felt strange to read from a vendor: if you want something, buy it sooner rather than later, because prices will stay volatile. I keep turning that over. It applies just as much to the second-hand listing you have had open in a tab for three weeks. Whichever side of this you land on, the hardware is not getting cheaper while you deliberate.
I will keep running the EliteDesk. If it died tomorrow and I had no plans beyond lights and sensors, I would probably buy a Green and be quietly relieved about the firmware updates.
For most of the time I’ve been doing this, “battery-powered presence sensor” was a contradiction in terms. mmWave radar — the technology that can tell a person sitting perfectly still on a sofa from an empty room — drinks power. So the rule was simple: if you wanted real presence detection, you ran a wire. If you wanted a battery, you got a PIR motion sensor and you accepted that the lights would go off on you mid-paragraph because you dared to read a book without waving your arms.
That rule quietly died over the last year, and I’ve spent the past week reading teardowns and reviews to figure out what my own shortlist looks like now. Here’s where I landed — and what I’m actually going to do about it, which is not “buy everything”.
The trick: PIR wakes the radar
The breakthrough isn’t a magically efficient radar. It’s a division of labour. The new generation of battery sensors — Aqara’s FP300 and SwitchBot’s Presence Sensor are the two prominent ones — pair a nearly-free-to-run PIR sensor with a 60 GHz mmWave module that sleeps most of its life. PIR spots you entering the room and wakes the radar; the radar holds the room “occupied” while you sit still; when it decides the room is empty, it goes back to sleep and hands the watch back to the PIR.
Both devices use the same radar chip, a Possumic RS6130, which SmartHomeScene’s teardown of the FP300 found is built around an ultra-low-power mode that lets it stay useful for years on coin cells. Aqara claims up to three years on two CR2450s — for a device that also reports light, temperature and humidity. The SwitchBot runs on ordinary AAAs, which I appreciate on principle; coin cells are the one battery format I always forget to stock.
I want to be honest about the trade-off baked into this design: the radar only wakes when the PIR triggers. Walk-in detection is PIR-grade, not radar-grade, and there are edge cases — a room you enter very slowly, or re-enter within the radar’s sleep window — where the handoff can stumble. Reviewers report it works well in practice. But it’s a duty-cycle trick, not free energy, and it behaves like one.
My 2026 shortlist, by job
Battery, no wires, mainstream: the Aqara FP300 is the obvious pick, and not just because everyone says so. It speaks Zigbee or Thread — you choose — which means it drops straight onto my existing Zigbee2MQTT network with no app, no cloud, no account. Five sensors in one housing (mmWave, PIR, lux, temperature, humidity) also means one battery to manage instead of three separate devices. Derek Seaman’s Home Assistant-focused review covers the setup details well.
Wired, local-first, tinkerer-friendly: the Everything Presence Lite remains the best value in the ESPHome camp at around $35. It’s an ESP32 with a 24 GHz radar that tracks up to three targets with live X/Y coordinates, and because it’s ESPHome, the firmware is yours — no vendor app, no phoning home, updates on your schedule. Apollo Automation’s MSR-2 and R PRO-1 play in the same league; the R PRO-1 even takes Power-over-Ethernet, which is the kind of thing that sounds excessive until you’ve fished a USB cable through a finished wall.
Budget: the Sonoff SNZB-06P at roughly $15 is still the honest cheap option. It’s a 5.8 GHz radar, so it’s less precise than the 24/60 GHz crowd and it has no PIR, but for a hallway or bathroom where you just need “is someone in here, including standing still at the mirror”, it does the job — and as a mains-powered Zigbee device it doubles as a router that strengthens the mesh.
DIY: an ESP32 plus a Hi-Link LD2410 module costs a few francs and twenty minutes of your evening. This is how I first learned what mmWave could do, and the community support in ESPHome is still excellent. It won’t win on looks. It will win on understanding exactly what your sensor is doing and why.
The point of good presence detection: the house just knows, and no panel or app needs touching. Photo via Pexels.
The local-first fine print
A few things I weigh that spec sheets don’t mention. Battery Zigbee devices are end devices, not routers — an FP300 joins your mesh but doesn’t strengthen it, while a wired Sonoff or a plug-in Apollo does. ESPHome devices are the gold standard for ownership: the configuration lives in my Git repo next to everything else, and no firmware update ever arrives without my say-so. And Aqara’s older FP2 — still a fine sensor with its 30 configurable zones — needs the Aqara app for initial zone setup. You can uninstall the app afterwards and run it locally via HomeKit, but “install our app first” is exactly the kind of small concession I’ve been trying to stop making.
Placement matters more than brand, by the way. mmWave sees through more than you expect: a fan, a curtain breathing near a tilted window, even a large houseplant in an air current will hold a room “occupied” all night. Every one of these sensors has sensitivity and zone controls for a reason. Budget an evening of tuning per room, whatever you buy.
What I’m actually doing
Not replacing everything, that’s certain. The PIR sensors in the hallway and the storage room are staying — for rooms you only walk through, presence detection solves a problem that doesn’t exist, and a PIR on a lithium cell will outlive some of my appliances. The office and the living room are different: those are the two rooms where somebody regularly sits still for an hour and gets plunged into darkness for it, and those are the two rooms that justify real presence hardware.
The office already has a wired ESPHome radar and it isn’t going anywhere. For the living room — where my better half has opinions about visible cables that I have learned to respect — the FP300 is the first battery sensor I’d actually consider, precisely because it asks for no wire, no app and no cloud. That combination didn’t exist two years ago at any price. That’s the quiet story of 2026 so far: the compromise between “works properly” and “goes where I want it” is finally dissolving, one duty-cycled radar at a time.
Good roundups if you want to go deeper: SmartHomeScene keeps a continuously updated best-and-worst presence sensor list — including the ones to avoid, which is half the value.
For as long as I have been putting radios in this flat, the advice has been the same and it has been boring: pick one protocol per device and stop fiddling. A bulb is either a Zigbee bulb on my Zigbee2MQTT network or it is a Thread device on somebody’s Matter fabric. Not both. That constraint is the reason my mesh is stable, and it is the reason I can answer the question “what happens if the internet dies” with a shrug.
Silicon Labs and Signify announced on 23 June that they are removing the constraint. Select Philips Hue bulbs built on Silicon Labs’ MG26 and SiMG301 wireless SoCs will run Zigbee and Matter over Thread concurrently — the same bulb, the same radio, two networks at once. Today those bulbs still make you choose at commissioning time. The firmware update that flips on concurrent operation is promised “later this year.”
My first reaction was that this is a marketing slide. My second reaction, after reading how the silicon actually does it, was more interesting: it is real, it is clever, and it quietly changes what “my device” means.
Why one radio can do this at all
Zigbee and Thread are not rival radio technologies. They are rival network layers sitting on the same 802.15.4 PHY, both using OQPSK modulation in the same 2.4 GHz band. That shared foundation is the whole trick. Silicon Labs’ own multiprotocol documentation spells out the easy case: if both networks happen to sit on the same 802.15.4 channel, a single radio can receive Zigbee and Thread frames concurrently with no time slicing at all. It is just listening. The upper layers sort out which stack gets the packet.
The hard case is the realistic one, because your Zigbee coordinator and your Thread border router almost certainly did not pick the same channel. For that, the chips use what Silicon Labs calls concurrent listening: the radio flips between two channels on the order of tens of microseconds, just long enough to sniff for a preamble, and parks on whichever channel is actually talking. It is not the coarse time-slicing that Bluetooth-plus-Thread devices have to do, because Bluetooth uses GFSK and genuinely requires the radio to change modes. Two 802.15.4 networks are close enough cousins to share.
There is a cost, and it is documented rather than hidden. Silicon Labs notes that enabling concurrent listening degrades PHY performance slightly, with 802.15.4 sensitivity dropping to around −98 dBm. That is a general figure for the feature, not a measurement of any specific Hue bulb, and I would not pretend otherwise. But directionally it is what you would expect: a radio that spends part of its life looking somewhere else hears a little less well. In a dense mesh with a mains-powered bulb every four metres, a decibel or two is noise. At the ragged edge of coverage — the garage, the far end of a concrete corridor — a decibel or two is the difference between a device that responds and a device you have to go and reset.
Two protocols, one bulb, and a growing number of things competing for the same 2.4 GHz air. Photo: Pexels
The channel-planning problem nobody wants to talk about
Here is the part that actually worries me, and it has nothing to do with Hue. Everything above lives in 2.4 GHz. My Zigbee network is on channel 20 specifically because it sits in a gap between the Wi-Fi networks my neighbours run, and finding that gap took an evening with a spectrum scan and a bad mood. A Thread border router commissioning itself onto a channel of its own choosing is one more radio competing for the same air.
Until now, a dual-stack device was a device that had picked a side, so its traffic all went to one place. A bulb that is genuinely live on two 802.15.4 networks is emitting for both, answering both, and being polled by both. Multiply by thirty bulbs in a well-lit flat and the aggregate is not nothing. I have already written here about eight months I wasted blaming my walls for interference that turned out to be a USB 3 port. I am not eager to hand myself a new class of ambiguous RF problem to misdiagnose.
What it actually solves, and for whom
Be fair about the problem being fixed. Hue’s differentiated features — dynamic scenes, entertainment sync, the gradient stuff that genuinely does look good — live in the Hue Bridge and speak Zigbee. Matter gives you cross-ecosystem control and easy setup, but a Matter-over-Thread Hue bulb was a dumber Hue bulb. Signify’s CTO for Hue, George Yianni, framed the collaboration as supporting “the interoperability consumers want through Matter while preserving the advanced capabilities” of the Hue ecosystem. Stripped of the press-release grammar, that is an honest description of a real trade-off customers have been complaining about for three years.
And for someone in a mixed household — an Apple Home user married to a SmartThings user, say — being able to bind the same bulb into Hue’s own world and into a Matter fabric without buying two bulbs is a genuine improvement. This is a good feature. It is aimed at people who are not me.
What I will actually do about it
Nothing, for now, and I want to be precise about why rather than waving the local-first flag.
My bulbs are joined directly to Zigbee2MQTT. There is no Hue Bridge in this flat, which means the entire premium half of the pitch — the scenes, the entertainment sync, the Hue app experience — is something I have already declined. What CMP offers me is the ability to also put a bulb into a Matter fabric I do not run, on a border router I do not own, for control I already have through Home Assistant. The value is genuinely zero here. That is not a criticism of the feature; it is just a reminder that “more connectivity” is only a benefit if you wanted the second connection.
The part I will be watching is the security surface, because it is new. A device that maintains simultaneous membership in two networks has two sets of credentials, two commissioning paths, and two ways to be talked to. Whether a Matter fabric can be joined to one of these bulbs without the Zigbee network noticing — and what a Zigbee2MQTT user would see if it happened — is not something the announcement addresses, and it is the question I would put first if I were reviewing one. My instinct is that Signify has thought about it. My instinct is not evidence, and the industry’s recent track record on default-open commissioning states is not spotless.
So the buying advice stays where it was. If you are building a local-first house, buy the plain Zigbee device, join it to one coordinator, and enjoy having exactly one thing to debug. Concurrent multiprotocol is not a reason to buy and not a reason to avoid — it is a capability that will quietly arrive in silicon you were going to buy anyway, and the interesting question is not whether it works. It is who else gets to talk to your lights once it does.
I will report back when the firmware lands and I can put a scanner on it. Until then: one radio, one network, one thing to blame.
Switzerland’s electricity regulator publishes a number every year that quietly undermines half the reasons people give for buying a UPS. In 2024 the average end consumer here experienced 21 minutes of interruption in total — 11 minutes of it planned, 10 minutes unplanned — across an average of 0.34 outages. Ten unplanned minutes. For the whole year. Spread across everyone.
So when I put a battery behind the HP EliteDesk 800 G4 that runs my Home Assistant OS install, I had to be honest about what I was buying. Not insurance against the grid — the grid is fine. Insurance against a much dumber category of failure. Framing it that way made the sizing questions easier and the shopping questions harder.
The grid is not what takes my house down
Every power loss my automation stack has actually suffered originated inside the building envelope. An RCD tripping because a cheap appliance decided to leak to earth. An electrician flipping the wrong breaker, because the labelling in this building was done by an optimist. Me, moving a freezer and discovering that the socket I unplugged shared a spur with the cupboard the server lives in.
None of those show up in a SAIDI figure. They are house events, not grid events, and they are far more frequent than ten minutes a year. Where supply is genuinely shaky, the case for a UPS writes itself. Here, the case is subtler, and it is entirely about what an ungraceful shutdown does to software that was mid-write.
What you are protecting is a SQLite file
Home Assistant’s recorder writes constantly. Every state change lands in home-assistant_v2.db, and with a few dozen Zigbee devices and some power meters that is a steady trickle all day. A mini PC with an NVMe drive shrugs at the wear — one of the reasons I moved off a Pi and an SD card. What it does not shrug at is losing power mid-write.
Modern SQLite in WAL mode is resilient and most hard cuts cost you nothing. “Most” is the operative word. The failure mode is not a dramatic explosion; it is a database that comes back slightly wrong and a history graph with a hole in it you notice three weeks later. Add a Zigbee coordinator yanked mid-firmware-operation, or an add-on’s config rewritten at exactly the wrong instant, and the argument becomes simple: I would like the machine to be told about the outage and shut itself down, rather than being executed.
That is the whole feature. Not “keep running through a blackout.” Just: find out, and land the plane.
The dramatic version of power loss is rare. The boring version — a tripped RCD in your own cupboard — is the one that actually gets you. Photo: Pexels
Sizing is the easy part, and it is where everyone overspends
The EliteDesk 800 G4 Mini idles around 10 to 13 watts depending on configuration — HP’s Energy Star figures land just above 13 W, reviewers measure a little lower. Mine sits at roughly 12 W with a Zigbee stick and an NVMe drive, and does not meaningfully move under Home Assistant’s workload.
Twelve watts is a rounding error to any UPS on the market. The smallest sensible line-interactive units start around 650 VA — roughly 360–400 W of real power — so the box loads one to about three percent. The temptation is then to buy either the cheapest thing on the shelf or something enormous because the runtime charts look impressive. Both are wrong. Cheap units frequently have no data connection worth using, and a UPS your automation system cannot query is just a slightly better power strip. Enormous units are wrong because runtime at three percent load is not something manufacturers characterise honestly — published curves usually start at 50 percent — and because sealed lead-acid packs in this class want replacing every three to five years regardless of how gently you treat them. Twice the capacity mostly buys twice the eventual replacement cost.
The box is not the only thing that needs to stay up
This is the part I got wrong on the first pass. I plugged in the server, felt clever, then realised that during an outage I would have a perfectly healthy Home Assistant instance that could not reach anything and that I could not reach either.
The Zigbee mesh illustrates the problem. My coordinator is a USB stick on the server, so it survives — but every mains-powered Zigbee device in the house is a router, and all of them die with the power. What is left is a coordinator talking to whichever battery sensors are close enough to reach it directly. Door contacts keep reporting; anything routed through a smart plug does not. Fine, as long as you know it — and a good reason not to build outage-critical automations on top of mains-powered relays.
More importantly: the router, the switch, and the fibre ONT. Without those, the mobile app cannot reach the box, the notification you carefully configured to warn you about the outage cannot leave the house, and remote access is gone. Together they are another 15–25 W in my case. That is what pushed me from “any small UPS” to “one with enough outlets and enough runtime to cover the whole networking shelf for long enough to matter.”
Sine waves, transfer times, and when the spec sheet earns its keep
Line-interactive units — the ordinary consumer kind — pass mains through directly and switch to the inverter in a few milliseconds when the supply drifts out of range. That transfer time is a non-issue for computer power supplies, which hold up easily across it. Online double-conversion units remove the transfer entirely at the cost of price, noise, and standby draw. For a home server cupboard, line-interactive is the right answer. The waveform question is the one worth reading carefully. Many line-interactive units output an approximated or stepped sine wave on battery rather than a true one — Eaton’s Ellipse PRO range, for instance, is line-interactive with an approximated sine output, and you have to move up to something like the 5SC to get pure sine. Power supplies with active PFC can behave badly on a stepped waveform: coil whine, extra heat, and in bad cases a reset at the moment of transfer — precisely the moment you needed it not to reset.
Here I have to be honest rather than dogmatic. The EliteDesk Mini runs on an external 65 W laptop-style brick, not a desktop ATX supply with active PFC, and small bricks are generally far less fussy about waveform — same for the router and the ONT. So for my specific load, the stepped-sine objection is weak. It stops being weak the moment a NAS or a desktop joins the same UPS, and most cupboards grow in exactly that direction. If there is any chance yours will, pay for pure sine now.
Making Home Assistant actually see it
A UPS your system cannot query is worth very little, and this is where the local-first setup pays off. Home Assistant’s Network UPS Tools integration is a Platinum-quality, local-polling integration used by about 4.1 percent of installs. It exposes battery charge, load, estimated runtime, input and output voltage, and a human-readable status sensor, polling every 60 seconds by default.
The detail the docs state plainly and people still miss: the integration cannot talk to a UPS directly. It is a NUT client. Something has to run the NUT server that owns the USB connection — a NAS, a separate small machine, or the Home Assistant host itself via the community NUT add-on. Running HA OS bare metal with the UPS plugged into that same box, the add-on keeps everything in one place. Point the integration at localhost:3493 and the sensors appear.
The automation in the official docs is the right starting point — trigger on the status sensor moving to On Battery, Battery Discharging, send a notification. Then extend it: wait for battery charge or estimated runtime to cross a threshold before shutting anything down. React instantly to every brownout and you will shut down cleanly for a two-second flicker, which is worse than not reacting at all.
Two documented limitations shape the rest: the integration reads NUT variables but cannot set them, and it does not support commands that take parameters. Anything more elaborate belongs in NUT’s own configuration.
The chicken-and-egg nobody warns you about
If Home Assistant shuts itself down gracefully and the UPS keeps happily supplying an empty socket, then mains returns two minutes later, you have a house that is dark in a different way: the automation server is off and will stay off until someone walks over and presses a button. That is a worse outcome than the corruption you were avoiding.
Solving it properly means the UPS cuts its own output once the shutdown completes and restores it when mains returns, with the machine’s BIOS set to power on when AC is applied — on the EliteDesk, an “After Power Loss: Power On” firmware setting worth checking before you need it. The UPS half varies by manufacturer, and NUT’s shutdown handling is well documented but genuinely fiddly. Budget an evening for it, not twenty minutes.
What I would tell someone starting this
Buy for the network shelf, not the server. The server is a 12-watt afterthought; the router and ONT decide whether you ever find out there was a problem. Check the NUT hardware compatibility list before you buy, because a supported data connection is the entire difference between a UPS and a heavy power strip. Prefer pure sine if a NAS or desktop might join the cupboard later. And size for a graceful shutdown plus margin for flickers, not for riding out a blackout — riding it out is a different and much more expensive project.
And accept that in a country with ten unplanned minutes of outage a year, this will look like a waste of money for a long time. It is the same bet as a backup routine: the value is entirely in the one evening it saves you, and you will not know which evening that is until it arrives.
For years, my answer to “which presence sensor should I buy?” came with an asterisk the size of a power brick. mmWave radar — the technology that can tell a sleeping human from an empty couch — was simply too hungry to run on batteries. If you wanted real presence detection instead of PIR motion blips, you accepted a USB cable snaking down your wall. In my house that meant exactly two rooms got proper presence detection, because those were the two rooms where I could hide the wire.
That constraint quietly died over the past year, and I don’t think enough people noticed. So today: a look at where presence sensing stands in mid-2026, what I’d actually put on my own walls, and the category of devices I’d still avoid even though they’re a third of the price.
The trick that made batteries viable
Quick recap for anyone who hasn’t fallen down this rabbit hole. PIR sensors detect changes in heat, which means they need actual movement. Sit still reading a book and your lights go out — the classic smart home embarrassment. mmWave radar detects micro-movements like breathing, so it knows you’re still there. The catch: radar transmits constantly, and constant transmission eats coin cells for breakfast.
The solution that finally shipped in current-generation hardware is almost annoyingly obvious: use both. A PIR sensor sips microamps and acts as the doorbell — the moment it sees motion, it wakes the mmWave radar, which takes over and holds presence until the room is genuinely empty. Then the radar goes back to sleep. The 60 GHz radar chip both Aqara and SwitchBot use in their latest battery sensors is built around exactly this duty-cycling idea, and it’s the reason we’re suddenly seeing multi-year battery claims on devices that would have lasted weeks before.
What I’d buy for battery-only spots
The Aqara FP300 is the one that’s been going in and out of stock since launch, and having read the teardowns and long-term reviews, I understand why. It packs the 60 GHz radar, a PIR trigger, plus light, temperature and humidity sensors into one puck running on two CR2450 cells, with a claimed battery life of up to three years. It speaks either Zigbee or Thread — you pick the firmware — and pairs with Zigbee2MQTT without any Aqara hub in sight, which is exactly how I like my devices: local, hub-free, and talking to the coordinator I already own.
One detail that matters if you’re deciding between the two radio modes: reviewers consistently report that the full set of configuration parameters is only exposed in Zigbee mode. The Thread/Matter firmware is far more limited. That tracks with my broader experience — Matter keeps promising the world and keeps shipping the lowest common denominator. For a Home Assistant household, Zigbee mode is the obvious choice, and it’s not close.
The SwitchBot Presence Sensor is the budget sibling worth knowing about: same radar chip, same PIR-wakes-radar principle, but powered by standard AAA batteries rated for up to two years. No environmental sensors, so it does one job — but AAAs are cheaper and easier to source than coin cells, and with fewer extras on board it may well outlast the FP300 in practice. If I were covering a hallway or a guest room where temperature data is irrelevant, this is where I’d save the money.
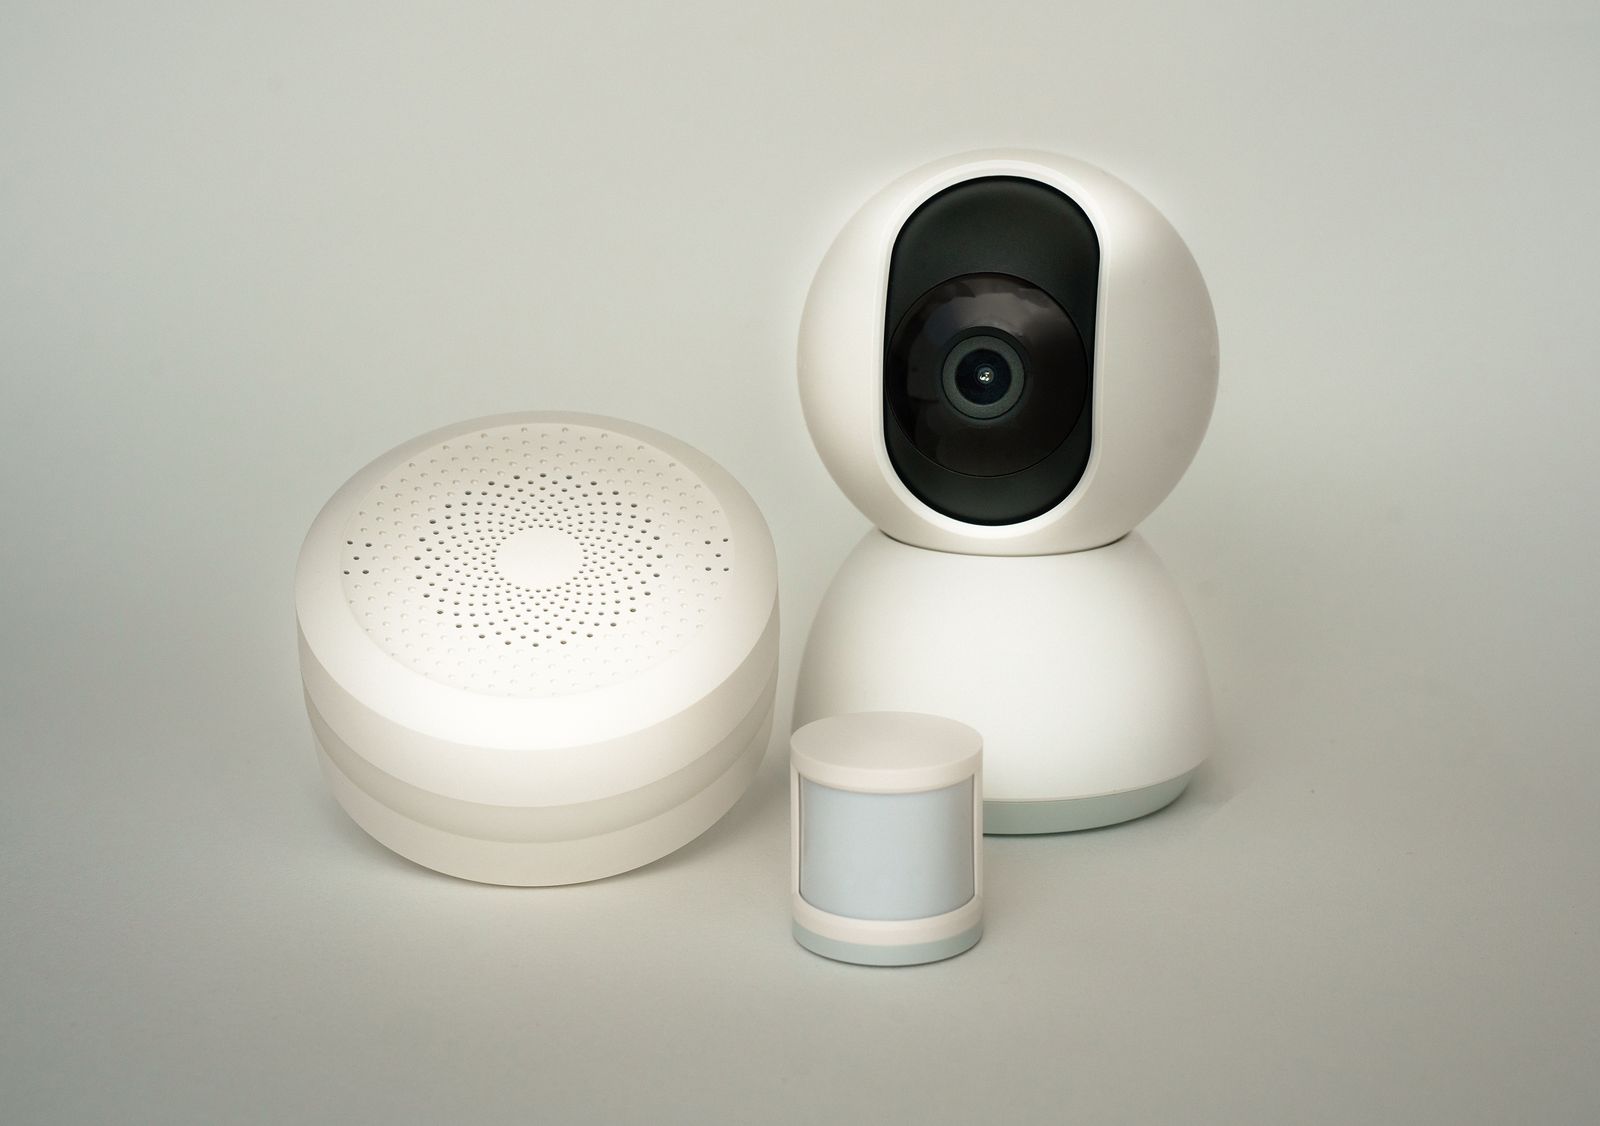
The modern sensor shelf: small, white, and increasingly wire-free. Photo: Pexels
Where wires still win
Battery sensors answer “is someone in this room?” Wired sensors can answer “where exactly, and how many?” — and if you have power available, that’s still a meaningful upgrade.
The Aqara FP2 remains the zone-mapping king: up to 30 detection zones in a single room, each exposed as its own occupancy entity in Home Assistant. Desk occupied, couch occupied, dining table empty — three different automations from one device. The honest caveat: zone setup happens in the Aqara app. It’s a one-time thing and you can uninstall the app afterwards, but for a no-cloud purist it’s a compromise, and I’d rather tell you that up front than have you discover it during onboarding.
For the ESPHome crowd, Apollo Automation’s R PRO-1 is the interesting one — dual mmWave radars (an LD2412 and an LD2450) with Power-over-Ethernet, natively ESPHome so it’s fully local and endlessly tweakable. PoE on a presence sensor sounds like overkill until you remember that anyone running cameras already has a switch with spare ports. And if your budget says otherwise, the Sonoff SNZB-06P has quietly become the default cheap wired Zigbee option — nothing fancy, but it holds presence reliably.
The DIY corner
An ESP32 plus a Hi-Link LD2410B/C module is still the cheapest way into mmWave, and the ESPHome integration is mature to the point of boring — which is the highest compliment I can pay infrastructure. The newer LD2412 and LD2450 modules now have official ESPHome support too, with the LD2450 adding multi-target tracking for those who want FP2-style capability without the app. My own bare-metal Home Assistant box already runs the ESPHome add-on for other projects, so the marginal cost of one more DIY sensor is a few francs of hardware and an evening of fiddling. That evening is the fun part, if we’re honest.
What I’d still avoid
The flood of cheap Tuya-based Zigbee presence sensors on AliExpress and Amazon is still going strong, and my advice hasn’t changed: skip them. It’s not that they can’t detect presence — many do it fine. The problem is how they behave as network citizens. Several of the popular models spam the Zigbee network with constant status updates, and testers have found this essentially unfixable. A single chatty sensor can degrade a mesh that dozens of well-behaved devices depend on. Saving twenty francs on a sensor isn’t worth destabilizing the network your whole house runs on.
The bottom line
For the first time, my recommendation doesn’t depend on where your power outlets are. Battery mmWave is no longer a compromise — the FP300 in Zigbee mode is a genuinely complete presence sensor you can stick anywhere. Wires still buy you zones and multi-person tracking, and DIY still buys you the most capability per franc. The only losing move in 2026 is the bargain-bin Tuya puck that turns your Zigbee mesh into a shouting match.
Next on my list: replacing the PIR sensor in the office — the room where I sit stillest, longest, and get plunged into darkness most often. If the FP300 survives a Swiss winter of radiator-adjacent mounting, you’ll read about it here.