Category: Guides

  • Zigbee2MQTT Stopped Trusting External Converters by Default. Mine Have Run Strangers’ Code for Years.

    Zigbee2MQTT Stopped Trusting External Converters by Default. Mine Have Run Strangers’ Code for Years.

    Buried in the release notes of Zigbee2MQTT 2.11.0, one line stopped me mid-scroll: “External extensions and external converters are now disabled by default for new installations.” My install predates the change, so nothing broke. Nothing even flickered. But I sat there with my coffee thinking about the JavaScript files I’d pasted into that folder over the years — code I’d copied from GitHub gists and forum posts, written by strangers, running with full access inside the process that controls every Zigbee device in my house.

    So this week’s post is half news, half confession, and half checklist. Yes, that’s three halves. It was that kind of audit.

    What actually changed

    Since version 2.11.0 — and still the case in the current 2.12.0 release from June — Zigbee2MQTT ships with external converters and external extensions off by default on new installations. If you need them, you now opt in explicitly with enable_external_js: true under the advanced section of your configuration. The change was contributed by Nerivec, who has been doing a lot of quiet hardening work on the project lately — the frontend also now refuses to save external JS files with invalid names.

    Existing installations are untouched. If your converters were working last month, they still work today. This is purely a change in what a fresh install trusts out of the box — which is exactly how breaking changes should be done, and the project deserves credit for it.

    Why this was overdue

    The official security documentation puts it plainly: external converters “execute arbitrary user-provided JavaScript code within the Zigbee2MQTT process,” and malicious or buggy code “can compromise the entire Zigbee2MQTT instance, and potentially the host system.”

    Think about what lives in that process. Your Zigbee network key. Your MQTT credentials. A direct line to every lock, relay, and sensor in the house. And the culture around external converters has always been wonderfully casual: you buy some obscure Tuya sensor for twelve francs, it pairs as “unsupported,” someone on a forum says “just drop this converter in,” and you do, because you want the thing working before dinner. I have done exactly this. More than once. The code was probably fine. “Probably fine” is not a security model.

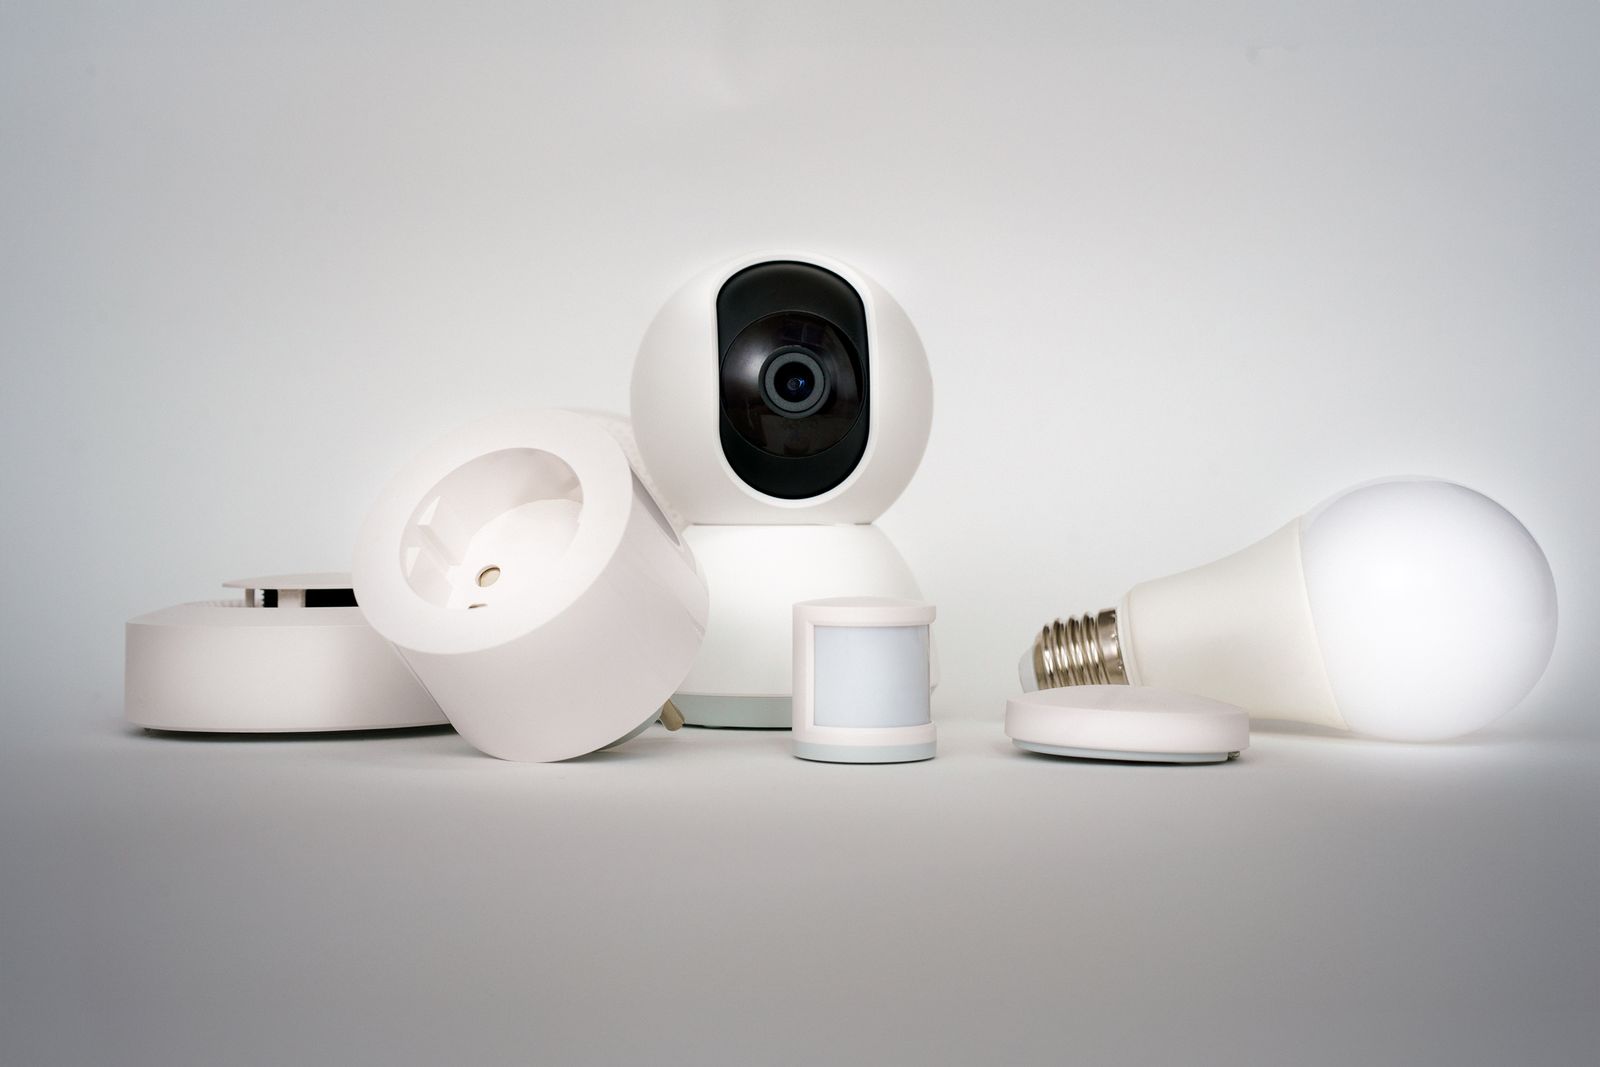
    Smart home sensors and devices laid out on a table
    Every one of these needs a converter to speak MQTT. Where that converter comes from matters. Photo: Pexels

    The audit one changelog line triggered

    After last week’s USB humiliation, my faith in “it’s been fine for years” is at an all-time low. So I SSH’d into the EliteDesk and actually looked at my external_converters folder. Three files. Two of them were for devices that gained official support ages ago — the docs even recommend this lifecycle: submit your converter upstream as a pull request, then delete the local copy once it ships in a release. I’d done the first part and skipped the second. Both deleted. The third, for a genuinely unsupported presence sensor, I actually read line by line for the first time since installing it. It’s clean. Now I know that, instead of assuming it.

    While I was in there, I worked through the rest of the project’s securing guide, and I’d encourage you to do the same, because some of these defaults are sneakier than the converter one:

    The network key. If your network is old enough, it may still be using the historical default key — the docs specifically call out [1, 3, 5, 7, 9, 11, 13, 15, 0, 2, 4, 6, 8, 10, 12, 13] and strongly suggest changing it. A default encryption key is a published encryption key. The fix is setting network_key: GENERATE, and the price is re-pairing every single device, which is why so many of us keep putting it off. Mine was already randomized from a rebuild two years ago; if yours isn’t, this is the least fun and most important item on the list.

    The frontend. By default it listens on 0.0.0.0 — all interfaces — and anyone who can reach it has full control, same as MQTT. Mine is now bound to localhost, with an auth_token stored in secret.yaml rather than the main config. If you only ever open the frontend through Home Assistant on the same box, there is no reason for it to be reachable from your whole LAN.

    File permissions. configuration.yaml contains your MQTT credentials and network key in plain text. chmod 600 on it and on secret.yaml took ten seconds.

    Joining habits. Permit-join is temporary by default (254 seconds), but I’m the sort of person who opens it, gets distracted by a compile error, and leaves it. Closing the window manually after pairing is now a habit. For devices that ship with install codes — increasingly common on newer gear — use them; they encrypt the initial key handover to the joining device.

    OTA sources. Zigbee2MQTT pulls firmware from the curated Koenkk/zigbee-OTA repository by default. Leave it that way unless you have a very good reason. A custom OTA index URL is a supply chain you’re choosing to trust with your door locks.

    What I’d do this weekend, in order

    If you run Zigbee2MQTT, here’s the priority list as I see it. First, open your external_converters folder and delete anything for a device that’s since gained official support — check the supported devices list, you’ll probably be surprised. Second, read what remains; it’s usually under a hundred lines. Third, check whether you’re on the default network key, and if you are, schedule the re-pairing weekend and just eat the cost. Fourth, bind the frontend to localhost and add a token. None of this requires new hardware or breaks anything that works.

    And if you’re setting up a fresh instance: leave enable_external_js off until the day you actually need it. That’s the default now, and it’s the right one.

    There’s a comfortable myth in this hobby that “local-first” automatically means “secure.” It doesn’t. It means the vendor’s cloud isn’t your problem — and everything else is. The Zigbee2MQTT project just made the everything-else slightly smaller for new users, and gave the rest of us a well-timed nudge to look at what we’ve been running. Take the nudge.

  • ESPHome Retired the Dashboard I Knew. Here’s the Checklist I Ran Before Updating My Fleet.

    ESPHome Retired the Dashboard I Knew. Here’s the Checklist I Ran Before Updating My Fleet.

    The ESPHome dashboard I’ve been staring at for years is gone. With the 2026.6 release, the old text-editor-with-a-device-list has been retired and replaced by the new Device Builder, which just hit 1.0.0 and is now the dashboard bundled by default in the official Home Assistant ESPHome add-on. There’s no opt-in toggle anymore — the preview switch from 2026.5 is gone. If you update the add-on, this is simply what you get.

    I run a dozen-ish ESPHome nodes off my bare-metal Home Assistant box, so “the tool I use to manage all of them got replaced” is not something I update casually. Here’s what I found when I went through the release notes properly, the checklist I ran before touching anything, and my honest take after living with the new builder for a few days.

    What the Device Builder actually changes

    The headline framing in the announcement post is beginner-friendliness: a visual component catalog, guided configuration, fewer datasheet treasure hunts. My first reaction to “visual builder” was mild dread — these things usually mean the YAML gets hidden behind three clicks. That’s not what happened here. The CodeMirror YAML editor is still front and centre; the visual layer sits alongside it, and you can flip between “steps” and “code” views of the same config.

    For someone managing an existing fleet, the genuinely useful parts are less glamorous than the catalog. There’s now a firmware job queue: compile, install, and clean jobs run in the background with progress and history, instead of the old one-operation-at-a-time model where a long compile held your browser tab hostage. Multi-select bulk actions let you update or label an arbitrary set of devices in one go. There’s a per-board pin info viewer that shows which GPIO does what and which component is already claiming it — the kind of thing I used to keep in a text file. And every device now carries out-of-sync diagnostics: a version badge, a config-hash check, and an encryption-state mismatch warning. On my setup that immediately flagged two nodes I’d flashed from my laptop months ago and forgotten to sync back.

    There’s also a YAML diff view before install, cross-config search, and a command palette. None of this is revolutionary on its own, but together it turns fleet maintenance from a sequential chore into something closer to an actual workflow.

    The checklist I ran before updating

    The dashboard swap is the visible change, but the upgrade checklist is where the real risk lives. Two items matter for most people.

    First, and biggest: ESP8266 devices now default to WPA2 minimum (min_auth_mode: WPA2), matching what ESP32 has done for years. ESPHome says roughly 40% of installs still run on ESP8266 hardware, so this is the broadest change in the release. If your access point is anything from the last decade, nothing happens. But if you have an old device hanging off a legacy WPA-only (TKIP) network — a garage AP, an IoT VLAN on ancient hardware — that device will silently stop associating after the update unless you pin min_auth_mode: WPA under wifi:. ESPHome has been printing a deprecation warning about exactly this since January, which I will admit I had been scrolling past.

    Second: if you still load anything from a custom_components/ folder, it’s time to migrate to external_components: — the legacy path is done. Smaller items: the dsmr electricity_switch_position sensor moved from sensor: to text_sensor:, and if your time: component uses platform: homeassistant with an explicit timezone:, Home Assistant no longer overrides your configured zone. That last one is subtle and exactly the kind of thing that breaks a sunrise automation three weeks later when you’ve forgotten you updated anything.

    Soldering tools and a circuit board laid out on a workbench
    The fun part of ESPHome has always been the workbench. The new builder mostly stays out of its way. Photo: Pexels

    The quiet wins: memory you already paid for

    My favourite change in 2026.6 isn’t the dashboard at all. If you set enable_on_boot: false on WiFi — the standard trick for battery-powered sensors that wake, transmit, and sleep — the WiFi driver previously stayed resident in memory anyway. Only the start() call was skipped. Now the heavy allocation is lazy, so a dormant WiFi interface genuinely costs zero internal RAM: roughly 15–30 KB of DMA-capable SRAM reclaimed, with ethernet getting the same treatment for another 3–8 KB. On an ESP32-S3 running audio plus a Bluetooth proxy, the ESPHome team measured free internal SRAM under peak load going from about 14 KB to 32 KB. On constrained boards, that’s the difference between “works” and “reboots at 2 a.m.”

    Config validation also got dramatically faster — up to 4.5× on LVGL-heavy configs — which matters now that the builder revalidates on every save. And the audio stack was reworked with zero-copy ring buffers throughout the voice assistant and media player paths. I don’t run ESPHome voice satellites yet, but the direction is clear: the platform is being tuned for heavier workloads on the same cheap silicon, which is very much the local-first bargain I signed up for.

    My take after a few days

    I updated the add-on on my EliteDesk the evening the release landed in my update list, with one deliberate precaution: I ran a full backup first and validated every config before flashing anything, then pushed updates to devices one at a time — the same rule I follow for Zigbee OTA updates. Nothing broke. My single remaining ESP8266 node (a basement humidity sensor) kept associating because my AP has been WPA2 since forever.

    The Device Builder itself? It’s better than what it replaced, and I say that as someone who was perfectly happy with the old text editor. The job queue and the out-of-sync badges alone justify the switch for anyone with more than a handful of nodes. The visual catalog I’ll probably use twice a year, when I’m wiring up something unfamiliar and want the pin map without opening a datasheet PDF. The important thing is what they didn’t do: the YAML is still the source of truth, still diffable, still mine. As long as that holds, I’m happy to let the training wheels exist for people who need them.

    One thing worth watching: the announcement mentions an official ESPHome Starter Kit made with Apollo Automation, shipping soon. An officially blessed hardware on-ramp plus a beginner-friendly builder is a clear play to grow the community beyond the tinkerer crowd. Given the alternative is another generation of cloud-tethered gadgets, I’m for it.

  • Zigbee2MQTT Can Now Abort a Stuck OTA. Here’s Why I Still Update One Device at a Time.

    Zigbee2MQTT Can Now Abort a Stuck OTA. Here’s Why I Still Update One Device at a Time.

    For the better part of two years my Zigbee firmware policy was a single word: don’t. If a sensor reported temperature and a switch switched, I left the firmware exactly where it was and slept fine. Zigbee over-the-air updates have a reputation, and it’s earned — they’re slow, they flood the mesh with traffic, and when one goes sideways you can be left with a device that’s neither on the old firmware nor the new one. So I avoided them.

    Then Zigbee2MQTT 2.12.0 landed on June 9th with one small line in the changelog that made me reopen the whole question: you can now abort a running OTA update. It’s a tiny feature. But it changed the math on a risk I’d been treating as all-or-nothing, and it’s a good excuse to write down the actual rules I follow now — because “never update” was never a real policy, just a way of avoiding a decision.

    This is a build log from one home, documented honestly. Nothing here is sponsored, and there are no affiliate links in this post — just the steps I’d want a friend to know before they touch firmware on a device they rely on.

    What actually changed in 2.12.0

    The headline addition is an abort path. In Zigbee2MQTT you start an update by publishing to zigbee2mqtt/bridge/request/device/ota_update/update with the device’s name or address. As of 2.12.0 there’s a matching .../ota_update/update/abort topic that takes the same payload and stops a transfer that’s in progress. In the frontend it shows up as a button next to the progress bar, so you don’t have to touch MQTT by hand.

    Why does a stop button matter so much? Because the failure mode I was most afraid of wasn’t a bad firmware — it was a transfer that crawls. A Zigbee OTA can take anywhere from ten minutes to well over an hour depending on the device and how busy your mesh is, and during that whole time the update is adding heavy traffic to the network. Before, if you kicked one off at a bad moment — right as everyone got home, lights and motion sensors all chattering — your only real options were to let it grind or restart Zigbee2MQTT and hope. Now you can call it off cleanly and try again when the network is quiet. That’s the difference between an irreversible commitment and a reversible experiment, and reversible experiments are the ones I’m willing to run.

    To be clear about what abort is not: it doesn’t roll a half-flashed device back to a known-good state, and it isn’t a recovery tool for a device that’s already wedged. It’s a way to stop a transfer you don’t want to finish. Useful, but it doesn’t repeal the rest of the rules.

    The part nobody warns you about: the reboot

    Here’s the detail buried in the Zigbee2MQTT docs that bit me the first time and that I now repeat to anyone who asks. When an OTA finishes, the device reboots into the new firmware — and depending on its power-on behaviour, that reboot can switch a relay on or flash a light. The docs say it plainly: the reboot “may cause unwanted interruptions or turn-ons.” Picture updating a bedroom light’s firmware at 11pm and having it blink to full brightness as it comes back up. Funny once, then never again.

    There’s a second surprise in the same paragraph. Because a firmware update can change what a device can do, Zigbee2MQTT treats a completed OTA a lot like pairing a brand-new device: it re-interviews the device to detect new capabilities and re-configures it. That re-configuration can overwrite custom reporting intervals with the defaults. If you’ve carefully tuned a sensor to report every two minutes instead of every ten, an update can quietly reset that, and you won’t notice until your automations feel sluggish a week later. So the post-update checklist isn’t just “did it survive” — it’s “did my custom settings survive.”

    A collection of smart home devices
    Smart-home gear that runs on firmware you can choose to update — or not. Photo: Pexels

    My actual rules now

    So I’m no longer a “never update” person. I’m a “update deliberately, one device at a time” person. The rules are boring on purpose:

    Read the release notes first. A firmware update can fix a real bug or close a security hole — or it can change behaviour in a way that breaks compatibility. The Zigbee2MQTT update check now surfaces release notes when the source provides them, so there’s less excuse to flash blind. If I can’t find out what a version changes, I don’t install it. “Newer” is not a reason.

    One device at a time, when the house is quiet. The official guidance is to update a single device while the network is in low demand, and it’s right. I do firmware in the late morning on a weekday when nobody’s home and the mesh is idle — never in the evening when motion sensors and switches are all talking. Batch updates are how you turn one slow transfer into a network-wide traffic jam.

    Check the battery on battery-powered devices. OTA is power-hungry. The docs recommend 70% or more, and some devices will simply refuse to update below a threshold. A flat coin-cell mid-transfer is exactly the kind of bad ending you don’t want, and it’s completely avoidable.

    Wake the device right before you start. Battery devices sleep, and a sleeping device won’t respond to a manual update request. A button press right before triggering wakes it; for the stubborn ones (some Legrand models are famous for this) there’s a “schedule” option that runs the update the next time the device itself checks in.

    Re-check custom settings afterward. Because of the re-interview, I now treat every successful update as a prompt to glance at that device’s reporting config and any binds, and put them back if they’ve reverted.

    So do you actually need to update?

    This is the local-first question underneath all of it. A lot of the smart-home world is built on the assumption that you should always be on the latest everything, because the cloud decides for you anyway. Running Home Assistant bare-metal with a local Zigbee mesh means I get to decide instead — and most of the time the honest answer is that a working device on stable firmware doesn’t need touching. I update when there’s a named bug fix or security reason that applies to me, not on a schedule and not for the version number.

    What 2.12.0’s abort button really changed isn’t how often I update — it’s how much dread is attached to each one. Knowing I can stop a transfer that’s misbehaving turns firmware from a one-way door into something closer to the rest of my local setup: try it, watch it, back out if it’s wrong. That’s the whole reason I went local in the first place. It’s nice to see the tooling catch up to the philosophy.

    If you’ve been avoiding Zigbee firmware updates the way I was, you don’t have to flip all the way to “update everything.” Pick one non-critical device, read its notes, do it on a quiet morning, and keep the abort button in your back pocket. That’s a policy I can actually live with.

    Sources: the Zigbee2MQTT OTA updates documentation and the Zigbee2MQTT release notes on GitHub.

  • Giving My No-Cloud Home a Voice: What a Used Mini PC Can Actually Run in 2026

    Giving My No-Cloud Home a Voice: What a Used Mini PC Can Actually Run in 2026

    The whole point of this house is that it does not phone home. The lights, the sensors, the cameras — all of it runs on a used HP EliteDesk 800 G4 sitting on a shelf, and none of it asks permission from a server in someone else’s data centre. So when I finally decided I wanted to talk to the place, the requirement wrote itself: my voice had to stay inside these four walls, same as everything else.

    That is more achievable in 2026 than a lot of people assume, and also more nuanced. Home Assistant’s voice stack is genuinely good now, but “fully local” hides a fork in the road that decides whether a cheap mini PC like mine sails through or starts wheezing. Here is what I learned actually setting it up, rather than reading the marketing.

    The pipeline, minus the cloud

    Home Assistant calls its voice system Assist, and the architecture is refreshingly simple to picture. A microphone hears you, a speech-to-text engine turns the sound into words, Home Assistant works out what you meant, and a text-to-speech engine speaks the answer back. Every one of those steps can run on your own hardware, with nothing leaving the network. The official docs are blunt about it: “Your spoken commands never leave your home.” That is exactly the sentence I was looking for.

    The pieces are glued together by the Wyoming integration, and the whole thing expects Home Assistant OS, which is what I run bare-metal anyway. For the microphone end you can use the companion app on a phone, an ESP32 puck you flash yourself, or the official Voice Preview Edition hardware. I will come back to the mic another day — the interesting decision lives one layer down, in how the words get transcribed.

    Speech-to-Phrase vs Whisper: the real fork in the road

    There are two ways to do speech-to-text locally, and they are not just “fast one” and “slow one.” They are philosophically different, and picking the wrong one for your hardware is how people end up frustrated.

    Speech-to-Phrase is a close-ended model. It only transcribes things it already knows about — your devices, your areas, the standard control sentences — and in exchange it is absurdly fast. Home Assistant’s own figure is sub-one-second transcription even on a Raspberry Pi 4 or a Home Assistant Green, which are far weaker than my EliteDesk. The catch is honesty about scope: open-ended stuff like adding items to a shopping list, naming a timer, or sending broadcasts is not available out of the box. It turns lights on. It does not take dictation. It was introduced back in Voice Chapter 9, specifically because home control does not actually need a model that can transcribe a podcast.

    Close-up of a fabric speaker grille
    A speaker is only half the story — the real decision is what does the listening. Photo via Pexels.

    Whisper is the opposite: an open-ended model that tries to transcribe anything you say. That flexibility is the whole appeal, but you pay for it in compute. The docs put a hard number on it — roughly 8 seconds to process a command on a Raspberry Pi 4, versus under a second on an Intel NUC. That gap is the entire story for hardware selection. Whisper is only worth running if you have decent silicon and you plan to push past simple home control, for example by wiring an LLM in behind it.

    For text-to-speech there is no real fork: Piper is the answer either way. It is a fast neural voice that was tuned for the Raspberry Pi 4, where it can generate about 1.6 seconds of speech per second of processing. On anything mini-PC-class it is effectively instant, and it sounds good enough that guests do not clock it as local.

    What my EliteDesk actually handles

    Here is where the spec sheet stops mattering and the bench test starts. The EliteDesk 800 G4 mini I use runs an 8th-generation Intel i5 with no discrete GPU. That puts it in the same broad neighbourhood as the Intel NUC the documentation uses as its “fast” reference point — comfortably faster than a Pi 4, comfortably slower than anything with a real graphics card.

    In practice that means Whisper’s speech-to-text is not the bottleneck I feared. Short control phrases come back quickly, nowhere near the eight-second Pi 4 figure. Piper is a non-issue. If all you want is to say “turn off the kitchen” and have it happen, a used mini PC running either speech engine will not embarrass itself. The honest surprise was how little the transcription step costs once you are off Raspberry Pi hardware.

    The LLM brain question

    The temptation, once the plumbing works, is to bolt a local language model onto the end so the assistant can actually converse rather than just match sentences. Home Assistant ships a native Ollama integration that makes this genuinely plug-and-play, and this is where the “fully local” dream gets expensive on a GPU-less box.

    Small models aimed at home control will run on a CPU, but you feel it. Community write-ups consistently land around the 6–12 second range for a CPU-only response, against 2–5 seconds when a GPU is doing the work, and the lighter home-tuned models churn out only a handful of tokens per second on a processor. That is the difference between a snappy assistant and one where you find yourself waiting and wondering if it heard you. My take: a used mini PC is a brilliant home-control voice box, but it is not the machine you want hosting a chatty local LLM. If that is the goal, the brain belongs on a separate machine with a graphics card, talking to Home Assistant over the network — not crammed onto the same little CPU that is already running the house.

    A caution before you upgrade

    One local-first reflex worth keeping: do not assume the voice stack is immune to a bad update just because it runs on your hardware. Around the 2026.6.2 core release, more than one person on the Home Assistant community forum reported losing Piper audio after upgrading. I have no way to confirm how widespread that was, and it may already be patched by the time you read this, but it is a good reminder to keep voice on a release you have actually tested and to read the breaking-changes section before you click update. Local does not mean fragile, but it does mean you are the one who notices when something breaks.

    Where I landed

    For a no-cloud home control voice on a used mini PC, Speech-to-Phrase plus Piper is the sweet spot — fast, private, and entirely happy on modest hardware, as long as you can live within its predefined commands. Whisper is the upgrade you reach for when you genuinely need open-ended speech and have the silicon to back it, and the conversational LLM layer is a separate project for a separate machine.

    What I appreciate most is that none of this required a subscription or a leap of faith about where my voice ends up. The same shelf-bound EliteDesk that already runs the house can now answer it, and that feels like the system working the way it was always supposed to. If you want to follow the canonical setup rather than my notes, Home Assistant’s guide to a fully local voice assistant is the place to start.

  • Local-First Isn’t the Same as Safe: Two Smart-Home Patches I’d Been Putting Off

    Local-First Isn’t the Same as Safe: Two Smart-Home Patches I’d Been Putting Off

    I tell myself I run a local-first house so I don’t have to think about other people’s servers. No cloud, no account I didn’t ask for, nothing phoning home at 3am. It’s a good philosophy, and most days it holds up. But “local” quietly turns into “trusted” in your head, and that’s the part that bit me. A couple of security write-ups landed in my feed recently, both about gear I actually run, and they nudged me into doing something I’d been avoiding: an honest security pass over my own setup. I found two things I’d been ignoring. Neither was difficult to fix. Both were embarrassing.

    The Shelly that never stopped broadcasting

    The first one came from a Pen Test Partners write-up published in February. The researcher — a self-described Shelly fan, which is the part that made me read it — noticed that his new fourth-generation Shelly 1 behaved differently from the older ones. Every Shelly starts life broadcasting its own open Wi-Fi access point so you can do the initial setup. On the Gen 1 through Gen 3 devices, that setup AP switches itself off once the device joins your network. On the Gen 4, it stays on. Permanently. The only hint is a small icon in the device’s status bar that’s very easy to miss.

    That sounds minor until you think about what an open access point on a relay actually means. Anyone in wireless range can connect to it and talk to the device directly — no password, because the setup AP doesn’t have one. The write-up shows a single unauthenticated HTTP request flipping a relay. If that relay happens to be wired to a gate or a garage door — a use case Shelly actively markets — then “anyone within range can open it” stops being abstract. It gets worse: a compromised Gen 4 can be scripted to reach across to other Shellys on your network, most of which people never bother to password-protect because they assumed the network itself was the boundary. And because these APs all advertise SSIDs starting with “Shelly”, they’re trivially findable on Wi-Fi mapping sites like wigle.net — some of them helpfully named things like “Garage”.

    Shelly told the researchers a fix would land in firmware 1.8.0 to close the AP outside the commissioning window, then reportedly went quiet on timing. As of the disclosure it was over 120 days since the first report. So this is the awkward bit: the patch may or may not be on your device yet, but the workaround is entirely in your hands and takes about thirty seconds.

    The thirty-second fix

    On each Gen 4 device, open its web interface or the Shelly app, go to Settings → Access Point, and toggle it off. Do this only after you’ve confirmed you can still reach the device over your normal Wi-Fi, otherwise you’ll lock yourself out of the management interface and have to power-cycle into setup mode again. While you’re in there, set a device password too. I went through every Shelly in the house, not just the Gen 4s, because it turned out I’d been relying on network segmentation to do a job that a five-character password should also have been doing. Two of mine still had the AP enabled. I’d installed them, seen them join the network, and never looked closer.

    The thing that stuck with me is the researcher’s point that experienced users are more at risk here, not less. If you’ve set up a dozen older Shellys, you’ve never once had to disable the AP manually — so it’s the last thing you’d think to check on a new one. Familiarity is its own blind spot.

    Close-up of a dark electronic circuit board
    The convenience of flashing your own firmware cuts both ways. Photo: TimSon Foox / Pexels.

    While I was at it: the ESPHome bug I’d skated past

    The second one hits closer to the heart of how I build things. I run a fair amount of ESPHome — the little ESP32 Bluetooth proxy I wrote about a few days ago is one of several scattered around the house. Last year a vulnerability tracked as CVE-2025-57808 was reported by ESPHome’s own jesserockz against the framework’s built-in web server. The flaw is almost funny in how blunt it is: the HTTP Basic Auth check on the ESP-IDF platform would accept an empty Authorization header, or one that merely matched the prefix of the correct credential. In other words, the password check could be bypassed by sending no password at all.

    The reason that matters more than a leaky relay is what it unlocks. Anyone on your local network could hit an affected device’s web server and, if over-the-air updates were enabled, push their own firmware to it. That’s not toggling a light — that’s replacing the entire brain of the device with something that survives a reboot and can pivot to whatever else it can reach. ESPHome shipped the fix in version 2025.8.1, so anyone who has updated in the last several months is already covered. But “I’ll update it later” is the natural state of a DIY sensor that’s been working fine for a year, and I had two devices that hadn’t been re-flashed since well before that release.

    Patching is the easy part: bump ESPHome in the dashboard or with pip install --upgrade esphome, then recompile and flash each device. The more interesting question the bug raised for me was whether I even need the web_server: component on most of those nodes. For anything that only talks to Home Assistant over the native API, the answer is no — disabling it removes the attack surface entirely. So I went through my YAML and turned it off everywhere I wasn’t actively using it for debugging.

    What “local-first” actually buys you

    Here’s the uncomfortable thread connecting both of these. The cloud platforms I avoid have one genuine advantage: they push security updates automatically, whether you want them or not. My setup updates when I push the update. That control is the entire point — it’s why I run Home Assistant on bare metal and keep my data in my own house. But control and responsibility are the same coin. Nobody is going to silently patch my Shelly or my ESP32 at midnight. If I don’t do it, it doesn’t happen.

    The other myth this punctured for me is that the local network is a safe boundary. Both of these attacks assume the adversary is already on your Wi-Fi or within radio range — and a lot of home setups, mine included, were implicitly treating “on the LAN” as “allowed to do anything”. It isn’t. A guest phone, a compromised smart TV, a kid’s laptop with something nasty on it — any of those is now inside your trust boundary. That’s the argument for putting your IoT gear on its own VLAN that I’d nodded along to for years and never fully acted on. I’m acting on it now.

    The weekend audit checklist

    If you want to do your own pass, here’s roughly what mine looked like, in order of how much it stung: check every Shelly for a still-enabled access point and disable it (Settings → Access Point), and set device passwords while you’re there. Update ESPHome to at least 2025.8.1 and re-flash anything that’s been sitting untouched, then strip the web_server: component from nodes that don’t need it. Confirm your Home Assistant and HAOS installs are current. And if your smart-home devices share a flat network with your laptops and NAS, start planning the VLAN split — it’s the single change that limits the blast radius of everything else.

    None of this is glamorous, and none of it produces a satisfying dashboard tile at the end. But it’s the maintenance cost of the thing I keep telling people is better. Local-first genuinely is better — more private, more durable, more mine. It’s just not automatically safe. That part is still my job, and this weekend was overdue rent.

    Sources: Pen Test Partners on the Shelly Gen 4 access point issue, and CVE-2025-57808 / the ESPHome 2025.8.1 release for the ESPHome authentication bypass.

  • From Wall of Entities to Calm Control Room: Building Your First Home Assistant Dashboard

    From Wall of Entities to Calm Control Room: Building Your First Home Assistant Dashboard

    When I first got Home Assistant running on my mini PC, the dashboard that greeted me was an overwhelming wall of every single entity in the house, dumped onto the screen in no particular order. Forty-odd lights, a dozen sensors, the print queue of a printer I’d forgotten was even smart. It worked, technically, but it was the opposite of calm. The whole point of automating a home is that the house gets quieter, not louder.

    So this is the guide I wish I’d had on day one: how to go from that default mess to a clean, room-based dashboard you’ll actually enjoy opening. No custom cards, no YAML, no add-ons — just the tools built into Home Assistant today. I’ll flag the YAML escape hatch at the end for when you outgrow this, but you won’t need it to get something good.

    First, understand what you’re actually editing

    Three words untangle most of the confusion. A dashboard is the whole thing you open — you can have several (one for the family, one for your own tinkering, one for a wall tablet). Each dashboard holds one or more views, which show up as tabs across the top; a view is usually one room or one theme, like “Living Room” or “Energy”. And each view is filled with cards, the individual tiles that show a temperature, toggle a light, or play music. Dashboard holds views, views hold cards. That’s the entire mental model.

    The good news for beginners in 2026 is that Home Assistant already builds a surprisingly decent starter dashboard for you. Out of the box it generates a “Home” dashboard that groups your devices by area, with summary cards for things like lights, climate and security pulled to the top — especially on mobile. If you’ve diligently assigned your devices to rooms, you may be 60% of the way there before you touch anything.

    Do the boring step first: assign everything to an area

    I know. You want to make it pretty. But every shortcut in modern Home Assistant leans on your devices knowing which room they’re in, so ten minutes here saves an hour later. Go to Settings → Devices & services → Devices, open anything that’s homeless, and assign it an area. While you’re at it, rename things to how you actually speak: “Bedroom lamp”, not “0xA4C138 — Tuya dimmer 2”. If you want to reorganise how rooms and floors are grouped, that lives under Settings → Areas, labels & zones. Anything left without an area gets dumped in an “Unassigned” pile, which is your to-do list.

    Smart home devices and a tablet on a wooden surface
    A good dashboard is the front door to all of this — it should feel calm, not crowded. Photo: Andrey Matveev / Pexels.

    Take control of the dashboard

    To start editing, open your dashboard, click the three-dot menu in the top-right and choose Edit dashboard. The first time, Home Assistant asks whether you want to take over control. Say yes. This converts the auto-generated dashboard into one you own and can change freely. The trade-off — worth knowing — is that it stops auto-updating as you add new devices, so future gadgets won’t appear by magic; you’ll add them yourself. That’s a fair deal for a layout that’s actually yours.

    If you’d rather experiment without fear, create a fresh dashboard to play in: Settings → Dashboards → Add dashboard. Build your masterpiece there, leave the original untouched as a safety net, and promote the new one once you’re happy.

    Build a room with a sections view

    When you add a new view, pick Sections as the type. This is the modern default and it’s the one to use. Sections arranges cards on a tidy grid and lets you cluster them into labelled groups — “Lights”, “Climate”, “Media” — and drag those groups around, all without the old trick of nesting cards inside vertical and horizontal “stack” cards. You can set how many columns it’s allowed to use, and it reflows sensibly between your phone and a widescreen monitor. For a beginner this is the single biggest quality-of-life feature: it makes a neat layout almost the default outcome rather than something you fight for.

    My advice: make one view per room. Living Room, Kitchen, Bedroom, Office. Within each, a section for lights, a section for climate, maybe one for media. Resist the urge to put everything on one giant screen — tabs are free, and a view you can take in at a glance beats a view you have to scroll.

    Add cards the easy way with the new card picker

    Inside a section, click Add card. In older versions this threw a grid of three dozen cryptic card types at you and wished you luck. The 2026.6 release rebuilt this around a much friendlier idea: instead of asking which card type you want, it asks which thing in your home you want to show, then suggests the cards that actually make sense for it. Better still, every suggestion renders as a live preview using your own data, so you see exactly how that thermostat or light tile will look before you commit. If you’ve installed any community cards, their suggestions appear in a separate section just below the built-in ones.

    For most rooms you only need a small vocabulary of cards. The Tile card is your workhorse — one clean tile per light, switch or sensor, tappable to toggle, hold for more. The Area card gives a whole room at a glance with a photo background. Thermostat for heating, Light for a dimmer you want a big control on, and a Weather or Energy card if you like those up top. Start with Tile cards everywhere and only reach for fancier ones when a tile genuinely isn’t enough.

    Polish, then stop

    A few finishing touches go a long way. Give each view an icon so the tabs are scannable — a sofa for the living room, a bed for the bedroom. Drag your most-used view to the front so it’s what opens first. And genuinely consider deleting cards: the dashboard you check ten times a day should show the ten things you actually act on, not all 200 entities you happen to own. The printer ink level can live on a “Stuff” tab you never visit.

    Then — and this is the hard part for people like me — stop fiddling and go live with it for a week. You’ll quickly learn which cards you reach for and which were just decoration, and the second pass will be far better informed than any amount of upfront agonising.

    When you outgrow the UI: the YAML escape hatch

    Everything above happens in the visual editor, and for a lot of people that’s the whole journey. But eventually you’ll want something the buttons don’t offer — a templated card that changes colour on a condition, or to copy a perfect room layout to three other rooms without re-clicking it all. That’s when you flip a view (or the whole dashboard) into raw configuration editor mode from the three-dot menu and edit the underlying YAML directly. It’s the same dashboard, just described in text you can copy, paste and version-control. My honest advice: don’t start there. Learn what a good dashboard feels like in the UI first, and drop into YAML only when you hit a specific wall. You’ll write much better config once you know what you’re aiming for.

    That’s it. Assign your areas, take control, build one sections view per room, lean on the new card picker, and be ruthless about what earns a spot. Do that and the dashboard stops being a chore you tolerate and becomes the calm little control room the whole project was supposed to produce.

  • The €6 ESP32 That Fixed My Bluetooth Dead Zone (and Why 2026.6 Made It Battery-Friendly)

    The €6 ESP32 That Fixed My Bluetooth Dead Zone (and Why 2026.6 Made It Battery-Friendly)

    For about a year I had a dead zone in my flat. Not for Wi-Fi — for Bluetooth. The little Xiaomi thermometer in the bedroom and a SwitchBot in the cellar were technically in Home Assistant, but their readings arrived late, or not at all, because the only Bluetooth radio in the house was inside my server. And my server lives in a cupboard in the hallway, two concrete Swiss walls away from where the sensors actually are. I run Home Assistant OS bare-metal on a used HP EliteDesk 800 G4 mini PC, which is a fine little machine, but no amount of CPU helps a 2.4 GHz signal through reinforced concrete.

    The fix turned out to cost about six francs and a free evening: a spare ESP32 board flashed as a Bluetooth proxy. And as of the 2026.6 release, the one real downside of doing this — that it quietly murdered the battery life of every sensor it touched — has been dealt with. Here is what I did, why it works, and what changed.

    Disclosure: some links on this page may become affiliate links. If you buy through them, I earn a small commission at no extra cost to you. I bought my hardware myself.

    What a Bluetooth proxy actually is

    The idea is simpler than the name suggests. An ESP32 is a cheap microcontroller with Wi-Fi and Bluetooth built in. Flash it with ESPHome’s Bluetooth proxy and it becomes a small, dumb relay: it listens for the Bluetooth Low Energy (BLE) advertisements that your sensors constantly broadcast, and forwards them to Home Assistant over your normal network. Your server stops being the only Bluetooth ear in the house and instead gets as many ears as you have ESP32s, scattered wherever the signal is weak.

    Crucially, none of this touches a cloud. The sensor talks to the ESP32, the ESP32 talks to Home Assistant over your LAN, and that is the whole journey. For a blog whose entire premise is local-first, no-account home automation, a Bluetooth proxy is almost the platonic ideal of a gadget: it adds range and adds nothing else.

    Close-up of a dark circuit board
    A €6 board and a USB cable buy you a second Bluetooth radio for the house. Photo: TimSon Foox / Pexels.

    The five-franc shopping list

    You do not need anything fancy. I used an ESP32-C3 SuperMini — a board roughly the size of a postage stamp — but any ESP32 dev board works. The genuinely cheap clones from the usual marketplaces are fine for this job; the proxy does very little compute, so board quality matters far less than placement. The only thing I would insist on is a real 5 V USB power supply rather than a flaky phone charger, because an undervolted ESP32 drops Wi-Fi at the worst moments and you will spend an evening blaming the wrong thing. Ask me how I know.

    Plan one board per problem area. In my flat that meant one in the bedroom and one near the cellar door. Mains-powered, always on, tucked behind furniture. They draw a couple of watts and you forget they exist.

    Flashing it (the genuinely easy part)

    This used to involve toolchains and tears. It does not anymore. Home Assistant publishes a ready-made Bluetooth Proxy installer you open in a Chromium-based browser. Plug the ESP32 into your laptop over USB, click install, hand it your Wi-Fi credentials, and a few minutes later it pops up in Home Assistant asking to be adopted. No YAML required for the basic case. If you already run the ESPHome add-on, you can adopt the device there and tweak its config, but you genuinely do not have to.

    Once adopted, the magic is that you do nothing else. Existing Bluetooth integrations — Xiaomi BLE, SwitchBot, Govee, the lot — automatically start using the nearest proxy as a relay. There is no per-sensor configuration. Home Assistant just notices it now has a closer radio and routes through it. The first time the cellar sensor updated in real time, I may have made a small noise.

    The catch nobody warned me about: battery drain

    Here is the part that took me a while to understand. Bluetooth scanning comes in two flavours. Passive scanning means the radio just listens for the advertisements devices already shout into the void. Active scanning means the radio shouts back — it sends a scan request to each device, asking for extra data, which forces the device to wake up and reply. Active scanning is what you need when you are first adding a device or pulling certain richer payloads. But it is also chatty, and every one of those replies costs your poor coin-cell sensor a little bit of life.

    For a long time the ESPHome proxy defaulted to active scanning all the time. So the very thing I installed to improve coverage was simultaneously interrogating my battery sensors around the clock, flattening cells that should last a year in a handful of months. The community workaround was to hand-edit the YAML and force passive scanning, accepting that you would flip it back to active for a few minutes whenever you needed to pair something new. It worked, but it was fiddly, and it was exactly the kind of footgun that makes people give up on this hobby.

    What 2026.6 changed

    The 2026.6 release made the sensible thing the default. There is now an Auto scanning mode that dynamically switches between active and passive depending on what is actually happening — it only goes active when an integration genuinely needs richer data, and stays passive the rest of the time. Per the release notes, this saves “around 95-96% of the battery used for Bluetooth scanning while keeping the same functionality for most setups.”

    Better still, it is the new default in three places at once: the core Bluetooth integration, ESPHome Bluetooth proxies, and Shelly devices used as Bluetooth scanners. If you previously had a proxy set to Active, the upgrade migrates it to Auto automatically. If you had deliberately forced Passive, that choice is respected and left alone. So for most people the win is invisible: you update, and your sensor batteries quietly start lasting the way they always should have.

    If you do hit a device that misbehaves under Auto — and a few oddballs will — you can still pin a specific adapter back to Active. Go to Settings → Devices & services, open the Bluetooth integration, and choose Configure on the adapter in question. But that is now the exception, not the ritual.

    A couple of things worth knowing before you build

    Two practical notes from living with this setup. First, leave the scan interval and window at their defaults. It is tempting to crank them for “better” coverage, but aggressive settings just heat up the board, hammer your Wi-Fi, and buy you nothing measurable. Second, if you want the proxy to actively connect to devices — not just relay their broadcasts, but hold a live connection for things like reading a lock state — keep the number of simultaneous connection slots modest. Three is the default and five is about the ceiling before an ESP32 starts running out of memory and getting flaky. If you need more, add another board rather than overloading one.

    That is the whole story. A spare microcontroller, a free installer, and a release that finally made the battery-friendly behaviour automatic. My bedroom thermometer now updates in seconds instead of minutes, the cellar sensor reports for the first time ever, and I have not changed a coin cell since. For the cost of a coffee, it might be the highest return-on-effort thing I have added to the house all year.

  • Choosing your first sensor protocol

    Sample starter post — replace with your real guide.

    The protocol you pick on day one shapes every purchase after it. Here’s the short version: Zigbee for breadth and price, Thread for the future, Z-Wave for range, and Wi-Fi only when you must.