For about a year I had a dead zone in my flat. Not for Wi-Fi — for Bluetooth. The little Xiaomi thermometer in the bedroom and a SwitchBot in the cellar were technically in Home Assistant, but their readings arrived late, or not at all, because the only Bluetooth radio in the house was inside my server. And my server lives in a cupboard in the hallway, two concrete Swiss walls away from where the sensors actually are. I run Home Assistant OS bare-metal on a used HP EliteDesk 800 G4 mini PC, which is a fine little machine, but no amount of CPU helps a 2.4 GHz signal through reinforced concrete.
The fix turned out to cost about six francs and a free evening: a spare ESP32 board flashed as a Bluetooth proxy. And as of the 2026.6 release, the one real downside of doing this — that it quietly murdered the battery life of every sensor it touched — has been dealt with. Here is what I did, why it works, and what changed.
Disclosure: some links on this page may become affiliate links. If you buy through them, I earn a small commission at no extra cost to you. I bought my hardware myself.
What a Bluetooth proxy actually is
The idea is simpler than the name suggests. An ESP32 is a cheap microcontroller with Wi-Fi and Bluetooth built in. Flash it with ESPHome’s Bluetooth proxy and it becomes a small, dumb relay: it listens for the Bluetooth Low Energy (BLE) advertisements that your sensors constantly broadcast, and forwards them to Home Assistant over your normal network. Your server stops being the only Bluetooth ear in the house and instead gets as many ears as you have ESP32s, scattered wherever the signal is weak.
Crucially, none of this touches a cloud. The sensor talks to the ESP32, the ESP32 talks to Home Assistant over your LAN, and that is the whole journey. For a blog whose entire premise is local-first, no-account home automation, a Bluetooth proxy is almost the platonic ideal of a gadget: it adds range and adds nothing else.

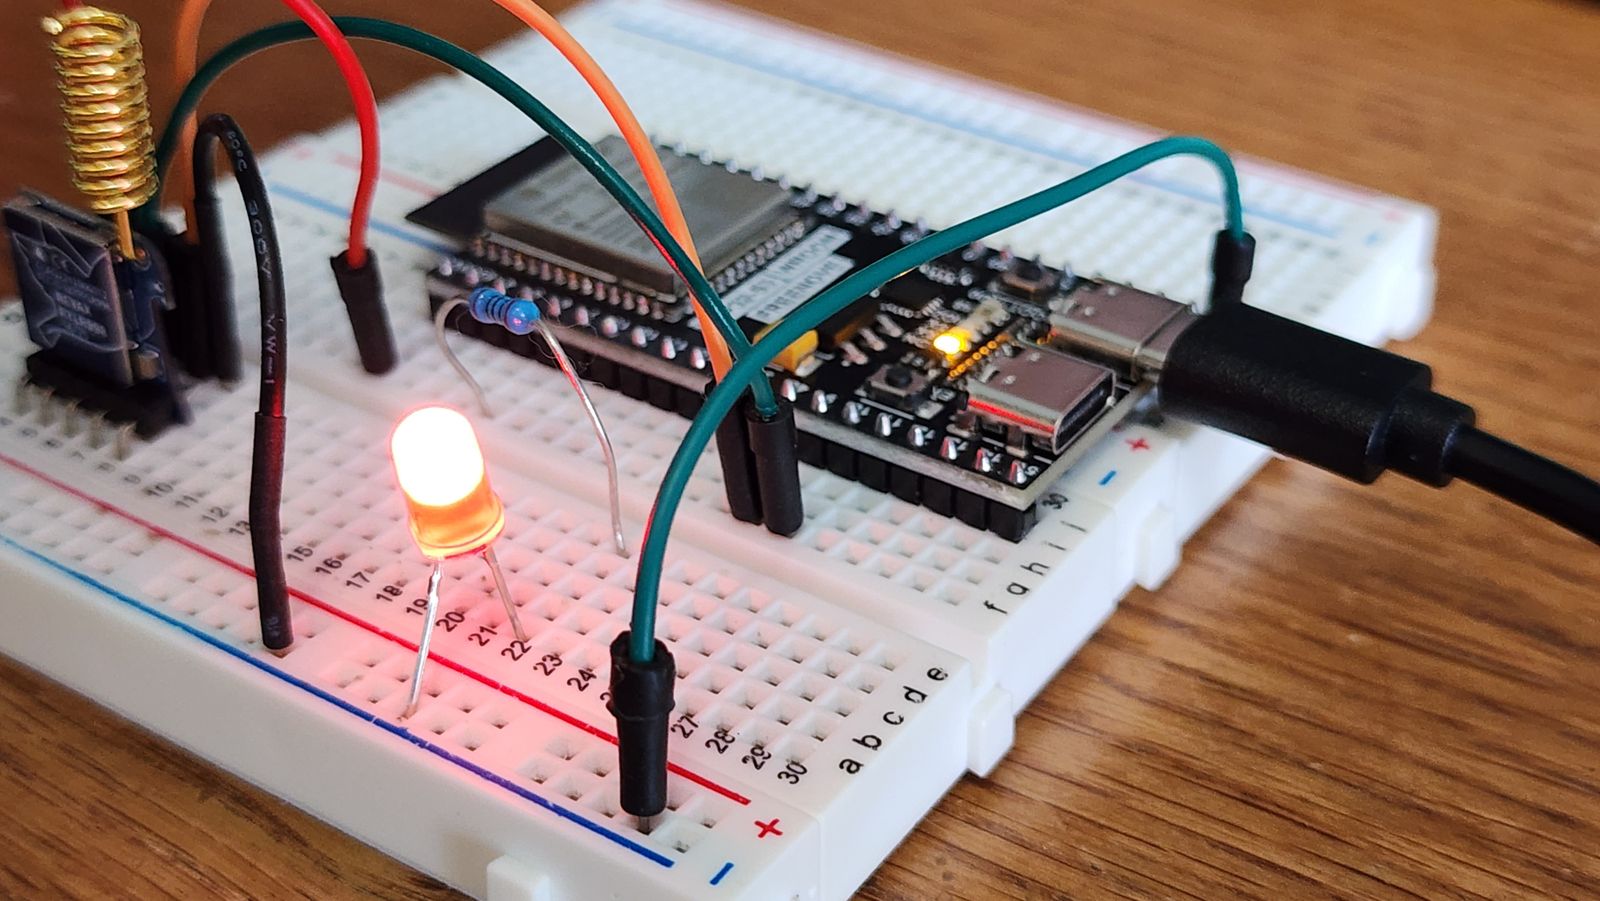
The five-franc shopping list
You do not need anything fancy. I used an ESP32-C3 SuperMini — a board roughly the size of a postage stamp — but any ESP32 dev board works. The genuinely cheap clones from the usual marketplaces are fine for this job; the proxy does very little compute, so board quality matters far less than placement. The only thing I would insist on is a real 5 V USB power supply rather than a flaky phone charger, because an undervolted ESP32 drops Wi-Fi at the worst moments and you will spend an evening blaming the wrong thing. Ask me how I know.
Plan one board per problem area. In my flat that meant one in the bedroom and one near the cellar door. Mains-powered, always on, tucked behind furniture. They draw a couple of watts and you forget they exist.
Flashing it (the genuinely easy part)
This used to involve toolchains and tears. It does not anymore. Home Assistant publishes a ready-made Bluetooth Proxy installer you open in a Chromium-based browser. Plug the ESP32 into your laptop over USB, click install, hand it your Wi-Fi credentials, and a few minutes later it pops up in Home Assistant asking to be adopted. No YAML required for the basic case. If you already run the ESPHome add-on, you can adopt the device there and tweak its config, but you genuinely do not have to.
Once adopted, the magic is that you do nothing else. Existing Bluetooth integrations — Xiaomi BLE, SwitchBot, Govee, the lot — automatically start using the nearest proxy as a relay. There is no per-sensor configuration. Home Assistant just notices it now has a closer radio and routes through it. The first time the cellar sensor updated in real time, I may have made a small noise.
The catch nobody warned me about: battery drain
Here is the part that took me a while to understand. Bluetooth scanning comes in two flavours. Passive scanning means the radio just listens for the advertisements devices already shout into the void. Active scanning means the radio shouts back — it sends a scan request to each device, asking for extra data, which forces the device to wake up and reply. Active scanning is what you need when you are first adding a device or pulling certain richer payloads. But it is also chatty, and every one of those replies costs your poor coin-cell sensor a little bit of life.
For a long time the ESPHome proxy defaulted to active scanning all the time. So the very thing I installed to improve coverage was simultaneously interrogating my battery sensors around the clock, flattening cells that should last a year in a handful of months. The community workaround was to hand-edit the YAML and force passive scanning, accepting that you would flip it back to active for a few minutes whenever you needed to pair something new. It worked, but it was fiddly, and it was exactly the kind of footgun that makes people give up on this hobby.
What 2026.6 changed
The 2026.6 release made the sensible thing the default. There is now an Auto scanning mode that dynamically switches between active and passive depending on what is actually happening — it only goes active when an integration genuinely needs richer data, and stays passive the rest of the time. Per the release notes, this saves “around 95-96% of the battery used for Bluetooth scanning while keeping the same functionality for most setups.”
Better still, it is the new default in three places at once: the core Bluetooth integration, ESPHome Bluetooth proxies, and Shelly devices used as Bluetooth scanners. If you previously had a proxy set to Active, the upgrade migrates it to Auto automatically. If you had deliberately forced Passive, that choice is respected and left alone. So for most people the win is invisible: you update, and your sensor batteries quietly start lasting the way they always should have.
If you do hit a device that misbehaves under Auto — and a few oddballs will — you can still pin a specific adapter back to Active. Go to Settings → Devices & services, open the Bluetooth integration, and choose Configure on the adapter in question. But that is now the exception, not the ritual.
A couple of things worth knowing before you build
Two practical notes from living with this setup. First, leave the scan interval and window at their defaults. It is tempting to crank them for “better” coverage, but aggressive settings just heat up the board, hammer your Wi-Fi, and buy you nothing measurable. Second, if you want the proxy to actively connect to devices — not just relay their broadcasts, but hold a live connection for things like reading a lock state — keep the number of simultaneous connection slots modest. Three is the default and five is about the ceiling before an ESP32 starts running out of memory and getting flaky. If you need more, add another board rather than overloading one.
That is the whole story. A spare microcontroller, a free installer, and a release that finally made the battery-friendly behaviour automatic. My bedroom thermometer now updates in seconds instead of minutes, the cellar sensor reports for the first time ever, and I have not changed a coin cell since. For the cost of a coffee, it might be the highest return-on-effort thing I have added to the house all year.
Leave a Reply